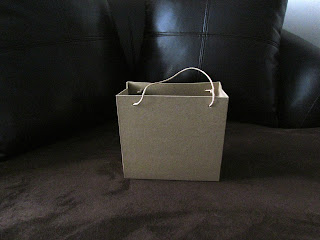
Now, what to do with them...hmmm. Since these are going to be Christmas gifts, what says Christmas better than 'Santa'? An idea has been born {haha}, so off to Michaels for some scrapbook paper to cover these in.
I didn't want the traditional fire engine red, so I opted for a deeper red with a shiny black and silver accent. At this point my creative juices began to flow and I decide that I would like to turn this into a 'treat tree'. Another trip to Michaels for styrofoam trees (my stash was depleted on the 12 Days of Christmas tree here) and some hunter green spray paint.
Sorry, but I don't have pics of the process for the Santa box. Most of this was done late at night and finding sufficient light in this house for photos is next to impossible...LOL. The steps I took to cover the boxes are these: (1) I took the handles off, (2) I measured each side of the box and cut the red paper down to size, (3) using Aleene's tacky glue I glued the cut pieces of red paper to each side including the bottom, (4) I added very thin black ribbon around the top and seams of the box, (5) I cut the black paper in two inch strips and glued them around the box in four separate pieces {two long/two short}, (6) I then cut the silver paper in a 3 inch x 3.5 inch square and cut out a square in the middle, (7) I cut a small strip to make the prong and glued it to the silver square, (8) I added a little bling with the crystal jewels on the belt {even Santa likes a little sparkle, don't ya think?}, (9) using a long craft stick I inserted it into the bottom of the tree, and (10) I glued the stick tree into another piece of styrofoam inside the box, filled the box with red and green tissue paper.
Here it is almost finished.
Now for the treats! After checking Pinterest, I found an easier version of a cake pop -- an Oreo pop found {here} from the Camp Clem blog. I bought double stuff Oreos, a box of candy canes, vanilla candy melts and wooden skewers (these have a sharp edge and work better than lollipop sticks since they needed to be stuck in the styrofoam tree) and with the help of the little prince we got to work.
I melted, dipped, dunked and refrigerated the Oreo pops and after they chilled a bit was able to bag them. Now here is where a brilliant idea was great in theory but poorly executed. I didn't think about how heavy these Oreo pops would be so the plan was to have ten of these around the cone in three layers. I learned very quickly that I didn't factor in the weight and after five of them they almost toppled over...YIKES! Removing some and choosing to just put them in the middle to evenly distribute the weight, this is what I ended with.
This is definitely not how I envisioned this project to end up...not even close, but when have any of my projects turned out exactly like I envisioned them -- hahaha!
The good side of this was that his teachers really like it and were thankful for our generosity. One of them even said she would try the Oreo pops with her two year old daughter. Now to me, that's a success!
From my family to yours, we wish you a Merry Christmas!
Where we are partying!


No comments:
Post a Comment