November 21, 2013

Thanksgiving Cards

It's almost Thanksgiving!  Retail would have you believe that it's Christmas {don't even get me started on that!} but for me, I love Thanksgiving and everything that goes with remembering my blessings and being grateful for my life.

I have been super busy lately but I just couldn't let the holiday pass without crafting something so I spent my day off playing around with my Silhouette machine.  Since joining my online Silhouette group, I've learned SO much about my machine and what it can do.  I have a long list of crafts I'd like to try, but I decided I would start simple.  Cards


Where is that turkey?


Pumpkin Love


All about the pilgrims

These were fun to make and I look forward to getting them in the mail this weekend to friends.

Happy Thanksgiving from my family to yours!

{Note: Sorry about the poor photos -- I'm learning to use my camera so these pictures were me playing around with different settings.  Give me grace...I'm growing in my photography.  (smile) }


Where we like to party!


Visit thecsiproject.com

November 18, 2013

A Pinterest Party!

I LOVE Pinterest!  I am such a visual person that this site is like Christmas all year round for me. If I can see it, then I can make it {or at least my version of it}.  I've been pinning and planning {mostly in my head...LOL!} for over a year now.  Part of the plan involved getting friends together to create something, a ladies night out of fun and crafting.  I mentioned this to my friend Tammy and she was all for it.  She was the push I needed to actually make it happen.  So this weekend, we threw our very first Pinterest Party!

We all know that a good party is about the spread, right?  Well, this was an evening affair so we offered light refreshments with a Pinterest inspired theme -- check it out!


Our lovely food table
Of course a party for me is as much about the small details as it is about the activity itself so I took the time to throw a little fun into the evening.

Pinterest Water
I created Pinterest water bottle labels using Microsoft Word, removed the other labels and replaced them with these.  Such a simple thing but a big impact.  Perfect!

Snack cups
I found this idea, where else, on Pinterest!  Cupcake baking cups filled with Chex mix and red M&M's.  The logo in the middle of the plate certainly makes it 'Pinterest'ing, doesn't it?  {smile}

Pigs in a blanket for those who might feel hungry after all the crafting

Pigs in a blanket with their own individual Pinterest toothpick.  Don't you just love these added touches?  I know I do!

After a little snack, it was time to get down to the business at hand -- crafting!


One of the ladies was a complete novice when it came to crafting and she even mentioned how "out of her comfort zone" she was coming to a crafting party.  We reassured her that all she had to do was keep calm and craft.  We promised that it would be okay and it was.

The two crafts for the evening
Tammy's dad had these amazing mason jars that he no longer needed or wanted.  Score!  Free materials -- the beginning of a wonderful craft project...HA!  Now if you've spent any time at all on Pinterest you know that there are pin after pin of crafts that involve them.  We chose to create a Fall inspired craft with the jars then picked a Christmas inspired one that involved a $1 paint brush from Walmart.


The ladies got right down to work.


Cathy thought that she was in over her head, but she Mod Podged like a pro!


Thasha was excited that one of the crafts involved Mod Podge -- a medium she had been dying to try out.


Rachel is a crafter in her own right, she makes and sells bows at her Etsy shop so she felt right at home with this craft.


Tammy was so inspired by the paint brush project that she decided to make two.


The frame used as a backdrop did double duty at this party.


But I have to show the comment love first.


It was time for our photo-op.  Since the party was at night and we were in my basement with overhead lights, it made taking good pictures a bit challenging for me {sorry, I know I REALLY need to learn to use my camera...lol}.  So when we asked Rachel to take a pic she suggested laying down on the ground to try and reduce the shadow.  As you can see, that didn't work because we were laughing too hard to be serious about it.  I'm sure Tammy is going to kill me for sharing this one but I just had to.  I promise not to share the others of us though...way too embarrassing!

Co-hosts
After the giggles were over, we got ourselves together enough to take one standing up.  I think we look great, don't you?


Here are two of the paint brushes.  Cute as a button, right?  Everyone had such a great time making these and can't you just imagine how cute they'll look added to a decorated Christmas tree?

Thanks ladies for joining us.  See ya at the next one!
We had so much fun that Tammy and I are planning our next party.  If you've been thinking about doing something like this, I say jump right in and give it a try....I don't think you'll be disappointed.

October 31, 2013

A Halloween Costume

HAPPY HALLOWEEN!!!

If your house includes little ones, I'm sure they are just about over the moon for the fun that will happen later tonight.  The little prince can barely contain himself.  It is all I've heard about the entire week and this mornings conversation was in overdrive!

Today's post is all about the fun I helped to create for my favorite customer.  Once again, she has challenged my skills in order to make her daughter's dream a reality.  This project involved sewing -- by hand nonetheless.  Now I'm sure I've said this before but it bears saying it again -- I don't sew!  Nope, sewing and I have what I consider a love/hate relationship.  In fact, for those who know me well know that sewing makes me sad.  Don't laugh...I really mean that!  So you can imagine all the things that ran through my head when my customer called me to say that she wanted me to make a costume for her little girl {say what??}.

The costume is based on this one from PBK.  They loved everything about it, except the price.

Source: Pottery Barn Kids - Super Hero Amazing Girl Costume
Cute, right?  That's what I thought too.  My second thought was how in the world was I going to recreate this.  She told me that I would only need to make the skirt, cuffs and mask because they owned a cape and crown.  Only those three, huh?  Well, I decided to jump in with both feet and I'm glad that I did.  I was extremely happy with the end product.  Was it the exact replica of this?  Hahaha, of course not!  We ARE talking about a non-sewer creating this, but it turned out magically and best of all I had a little girl who couldn't stop smiling.  That to me is always success!

I began with the skirt.  A trip to Hobby Lobby and I purchased the tulle, elastic, ribbon and this great gold shiny material that was a perfect match for the shoes she would wear.


I attached the tulle to the elastic in a pleated fashion.  I then began adding the shiny hearts {her cape has a large heart with a "C" in the middle for her name}.

A close-up of the heart
I placed each heart randomly around the tulle so they could be seen front and back then sewed them on.

Sewn onto the tulle
I included two layers of tulle for this with each layer folded in half so essentially there was four layers of tulle.  I included a layer of a satin material to create an 'underskirt' as well.

Underskirt

It was time to begin working on the ribbon band.


Now I have a finished skirt!


Unfortunately, in the end we decided to remove the underskirt...it just didn't work.

Next in line were the cuffs and mask.  For these I drew out the design and used coordinating felt to create them.


Okay, no comments about the eye holes...lol.  We realized after putting everything on that the eye holes needed to be made larger so I had to do some additional cutting.  Not the best work but her sight won't be impeded when she's out trick-or-treating.

Here is a look at Superhero Corrine in her entire outfit:


Could she get any cuter!?!  She was in love...and I do mean in love.  Can't you tell by this pose?  Thanks so much to her mom for sewing the heart/"C" onto the leotard to put the finishing touches on the top.

Now she's all ready to be Superhero Corrine and I'm so glad I was able to be a part of making that happen!

Hoping that you and your little one(s) have a safe and fun Halloween.

TRICK OR TREAT!!!


Where we like to party!


October 15, 2013

You've Been Boo-ed!

My neighborhood has a Halloween tradition of "Boo-ing" it's neighbors.  What, you never heard of being boo-ed?  Well don't worry, neither had I until I moved here.  Let me give you a little background.  Someone in the neighborhood leaves you a little Halloween bucket of goodies on your front porch and you are to pay it forward to someone else.  Cool, right?

We've been living here almost five years and this is the first time our house has been 'boo-ed'.  My son was overjoyed to see a bucket full of goodies -- a coloring book, pencils, a cup, glow stick, mini M&M's, Halloween mini bobble head toys, hand soap and Duncan Hines Simply Morning muffin mix.  We got a great bucket!

When I told my son what it was for and how we needed to do the same and leave it for someone else, he was all for it.  A trip to the dollar store and we were in business.  Check out our 'Boo Bucket'!


We decided on the kitty bucket because it was different than the normal plastic bucket and well....it's really cute!


We included a pack of glow sticks, a flashlight with interchangeable projector tops, a flashing ghost necklace, mini M&M's {because my son said we should}, a kitty drinking cup, a pumpkin plate, pumpkin mini baking cups and Pillsbury funfetti cake mix.

A view from the other side

Each bucket contains the goodies and also a little note.


Once you've received your bucket, you need to cut off the other side of the note and place your ghost on your door.  This way your neighbors know you've been boo-ed and will move on to another house.  I of course didn't do this part quick enough because we were boo-ed twice.  I was sure to share that bucket with another neighbor.


I hope the family that receives our bucket loves and enjoys it as much as we loved and enjoyed ours.  Happy Halloween neighbor!

October 11, 2013

More than a Frame

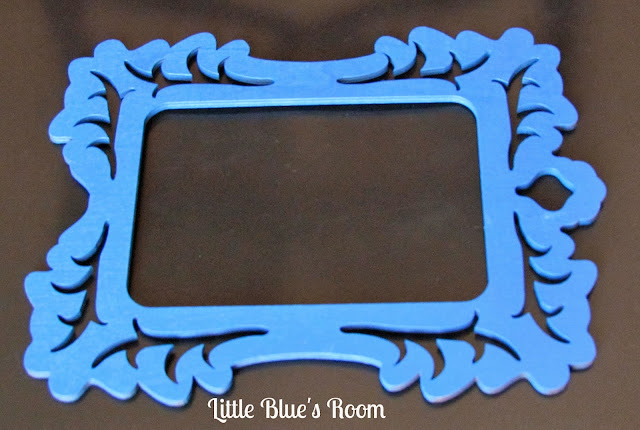
I found these frames in the clearance section of Michael's after Christmas.  With a price of about $2 each, I decided to pick up two of them.  I wasn't sure what I'd do with them but the "hoarder" in me was having a hard time leaving them in the store.  What?  You caught that?  The subtle reference to myself as a hoarder.  Yup, sure did.  Hi, I'm Angela and I'm a crafting hoarder.  First step to recovery is admitting, right? {giggle}


They were unfinished frames, so I grabbed a can of spray paint and got to work giving this beauty a little color.


Nothing in my crafting is ever quick and easy {smile}.  So after a few days of looking at this and wondering what else to do with it, I was inspired by something I saw from the online store Pick Your Plum.  I added some thin jewelry wire and attached it with hot glue and small pieces of felt.


I love the way it turned out.  It has many possibilities -- holding jewelry, Instagram pics, hair bows, etc.  It is currently hanging on my projects board {which is also waiting patiently for its turn to be transformed as well} but I have to be honest, I keep looking at it like I could do more with it.  You know what that means, right?  You'll just need to stick around to see what update I come up with!

October 7, 2013

Happy Anniversary!

Hey everyone, I'm back!!!  It's been over a month since I last posted...did you guys miss me?  Well, I've certainly missed you!  A month away gave me time to just slow down a bit and take a few things off my plate for a while.  Now that I'm feeling more refreshed, I'm back and ready to jump right in.

Today's craft comes to you via an Evite I received from a mommy friend of mine.  Her parents just celebrated their 20th wedding anniversary.  The Evite wasn't to attend a party for them, as they would be out of the country on their anniversary, but to do something much more special for them.  The 'invitees' were asked to send them an anniversary card.  The plan was for them to return home and see all the wonderful anniversary wishes from their friends and family.  They are blessed with amazing children who thought up this wonderful idea and it gave me such 'warm and fuzzies' that I couldn't wait to send my card.

Of course the crafter in me would not allow me to go and buy a card from the store.  For this special occasion I needed to make something just as special.  Here is what I created.

Happy Anniversary Richard and Libby!  Here's wishing you 20 more glorious years together!


The front


The inside

*** 10-08-13 EDIT ***

What a wonderful surprise for Libby and Richard.  Read on to see what they had to say about this heartfelt anniversary surprise party!

Dear Friends and Family,

Thank you all for your greetings and good wishes in celebration of our 20th wedding anniversary. 

When we returned from our trip  we had an “official” US Postal Service tub of mail waiting. Bills and catalogues, right?  We had no idea what was going on when found greeting card after greeting card as well as emails and phone messages all from very special friends and family!  

You would have enjoyed watching a couple of jet-lagged confused travelers trying to understand why and how. One of our neighbors had to explain that it was an Surprise Anniversary Card Party.

Thanks to our adult children for their creativity and effort in putting this together.

With love,
Richard & Libby

They were even kind enough to include a picture.  I'm so happy that they were surprised and that their "party" was such a huge success!

Side note {well because I just have too!}: It's too bad the post office couldn't keep from destroying the key -- next time I'll be sure to put "fragile" on the envelope.  Lesson learned.  


August 21, 2013

Welcome to First Grade!

Our summer is officially over.  Those lazy days filled with late bedtimes, relaxed schedules and living at a slower more enjoyable pace have ended and we are headed into another wonderful albeit busy school year.

Monday afternoon we attended Open House/Meet the Teacher and you could see the excitement in my little guy as he ran up to classmates he hasn't seen all summer with a huge smile and ready to share information about what's been happening in their time away from one another.  We entered his classroom, found his desk and learned what could be expected this year -- we even got the chance to snag a picture of the school mascot!


Last year I decided I would start a school tradition, first day of school pics which you can see in my Back to School post.  So to keep with tradition, I redesigned his sign to welcome him to first grade.

I searched the school website for a picture of the mascot and saved it to my computer.  Using PicMonkey, I used the 'Create a Collage' feature.  After playing around with different collages, I decided the one that worked best was 'Square Deal'.  I wanted this year's sign to reflect the school itself, so the first order of business was to change the background color to yellow.  I then uploaded the mascot picture and placed it in the first square.  I had to make some adjustments to the size of the squares because the picture was so large and I didn't want to loose any of it with a crop.  Once I was happy with it, I moved on to adding the very cool school paper 'Swatch' feature to the bottom two squares.  Perfect!  Now, it was time to click the 'Edit' button in order to add the text.  In the second square using the 'Bilbo Swash Caps' and 'Impact' fonts, I wrote "Welcome to First Grade" in the coordinating blue color.  In the two bottom squares, using the new 'Freshman' font I added the text "First Day of School" and the date he started.  Aaa-mazing!


I printed this on a piece of cardstock, replaced last year's sign with this one and look....another memory in the making!


 Happy first day of school my little prince, I know this is going to be an awesome year for you!


Where we like to party!

Visit thecsiproject.com

Related Posts Plugin for WordPress, Blogger...