Showing posts with label party theme. Show all posts

June 8, 2015

Spa Party Fun!

It's party time....oh, it's party time!

My Silhouette blogging buddies and I are at it again with this month's challenge -- Parties!  Not just birthday parties, any kind of party.  If you want to celebrate it, then it qualifies for this month's challenge.  18 participating bloggers let their imaginations run wild with decor, invitations, favors...you name it, we've done it.  The creativity is endless.

But before you get to the clickable link {below} to see the other projects, check out the great Spa Party birthday celebration my best customer threw for her sweet daughter's 7th birthday.


The party was held at a local spa party salon.  My customer loves to add a few extra special touches to her parties so she asked me to recreate a backdrop she found online.


Using foam core board as a base, I covered it with fabric and hot glued the flowers on top.  Each flower was made with cardstock paper {three 12x12 sheets per flower}, curled using a spatula {yup, a kitchen utensil} and glued together.  Lots of work, but worth it in the end, it really turned out beautiful!


Next on the list -- a birthday banner to cover a very large wall in the salon.  I found coordinating black and white stripe scrapbook paper and cut them into banners.  I then cut out the words in hot pink, lime green and lavender. Cute, right!?!


I made a few smaller flowers to create the party table centerpiece.  I really nailed the colors perfectly {smile}!


Birthday bundt cake from a local bakery.


Monogrammed cookies...yummy!


The girls wearing their party gift {personalized spa robes} and sitting at the nail bar.  They were so excited!


What fun!  Thanks so much to the Glenn family for allowing me to assist them in making this party so great and for taking all of the pictures as well.

Click your way to more inspiration below

My Silhouette Challenge buddies and I are all sharing projects on our blogs today, so peruse the projects below for a wealth of Silhouette inspiration!
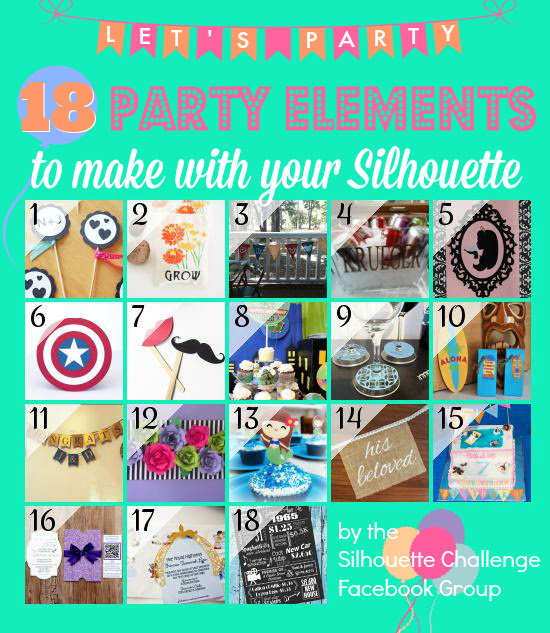
Engagement Party Cupcake ToppersDIY Stenciled Garden Party Favor BagsCreating Custom Party Decor for Next to NothingHow to Stencil an IceTub for BeveragesPrincess Invitation with a FREE Cut FileDIY Captain America Card"He Said She Said" Shower GameA TMNT 5th Birthday PartyWine Glass TagsSurfin Party Printables Part 2Engagement Party BannerSpa Party Fun!Mermaid Birthday Party IdeasDIY Burlap Chair Signs for the Bride & GroomDog Days of Summer PartyDIY Wedding Invites with a Mobile App and QR Code (and FREE Cut Files!)It's Party Time! DIY Stickers & Invites 50 Years Ago Birthday Sign with Free Printable and Cut Files
1. Two Purple Couches // 2. Practically Functional // 3. Crafty Bonds // 4. Dragonfly & Lily Pads // 5. From Whine to Whine // 6. Simply Kelly Designs // 7. unOriginal Mom // 8. MamaSonshine // 9. Get Silvered // 10. Made in a Day // 11. Weekend Craft // 12. Little Blue's Room // 13. The Stamp Doc // 14. The Thinking Closet // 15. Cupcakes&Crowbars // 16. Where The Smiles Have Been // 17. DIYJustCuz // 18. My Paper Craze

June 3, 2014

Shake it Up

My best customer is back at it again!  Her darling daughter turned six and she
pulled out all the stops to bring her dream to reality.

The birthday girl told her mom this year she wanted her party to be Shake it Up.  Don't know what that is?  It's a Disney show.  Oh wait, let me rephrase that - a cancelled Disney show.  Why mention the cancelled part, you ask?  Well because when a show is cancelled it becomes next to impossible to find the licensed products for it and that's what happened here.  Thank heavens for Ebay!  A search on the site and she found what she was looking for to make this party the awesome affair her daughter has become accustomed to.  She enlisted my help to put together a few little touches and she was on her way.

Thanks to a local kids party establishment, she was able to have a rockin' dance party -- Shake it Up style!


First things first, she wanted a cake topper.  She found one she liked and asked if I could recreate it for her.  She was able to find a few photos online of the main characters of the show for me to choose from.  After choosing the best ones, I headed off to the UPS store to have them enlarged.  Using the foam core board that I purchased from Hobby Lobby, I traced and cut out the two shapes.


After gluing the photos to the foam core and using sandwich toothpicks, I secured the characters to the styrofoam base.  Things were coming together well, but this was just the beginning - I needed to also cut her name out in foam core and paint the base orange.


Using floral wire, I was able to attach the 'Shake it Up' sign behind the characters.  Perfect!


Added on a few more decorative touches and one cake topper is finished.  Now it's time to work on the party favors.


The original party plans included a pinata but unfortunately the establishment did not allow things to be hung from the ceiling so that meant plan B.  Using the drink cups she received as part of her party pack, I created these candy cups (again, based on something she found elsewhere) that each of her guests received.


A late RSVP meant that the birthday girl would either have to forgo her candy cup or we'd have to come up with another idea.  Enter the birthday girls candy favor!  I found this cup at Michael's and after sending a few pictures of various cups to her mom for her approval, she liked this one the best.  What a time saver smart phone technology is!


Using my Oracal 651 outdoor vinyl (works best if you plan to wash the item), I personalized the cup first.


A trip to Party City and I picked up a variety of candy to add to the cup, being careful not to pick any peanut products as the birthday girl is highly allergic.  Talk about "WOW" factor!!

The day arrived and it was party time!  All pictures shown were given to me by my customer as I was unable to attend the party myself.  The birthday girl had a blast!

Party favors for the guests

Music CD's with personalized CD covers.  The back of this even had her picture on it -- too cute!

Another close-up

Photo op with the stars (and their choice of photo prop)

Birthday with flare!  Yes, I even made the cupcake toppers you see here too. :-)

Once again, I want to thank the Glenn family for allowing me to help make their baby girl's
birthday everything she wanted.  Until next year....


June 17, 2013

A Sign and Party Pics

May was a busy crafting month for me.  One of the projects I worked on were centerpieces for a Doc McStuffins birthday party for my best customer.  I'm so excited and honored to show you this party.  I loved the job she did for her sweet baby girl, I asked if she would allow me to share the party with my readers.

But before we get there I wanted to show you the sign that I made for her as well.  She found a Doc McStuffins chalkboard at the dollar store and asked if I could write the famous quote from the show "Time for your checkup".  Well of course!  Let me share just how simple that was.


The dollar store chalkboard -- great, right!?!


The process to write on the board is so easy you won't believe it.  Use your computer and type what you want in whatever font you want and print it out.  I chose a large rounded font which I think works better.


Time for your check up!


I cut out each word, turned them over and covered them completely with chalk.  Once they were covered, I placed them on the chalkboard where I wanted them {chalk side down}and used a pencil to fill in each letter.


Each word completely covered in chalk


All done!

After filling them in with pencil and removing the paper you'll want to go over each letter with chalk.  If you have any mistakes take a small paint brush and some water to remove the chalk {it's like magic eraser}.  My only advice - make sure you really cover each word with chalk.  If you don't it will be to light to go over afterward.

Now without further ado, it's party time.  Here is Miss Corrine's 5th Birthday Party!


The invitation


The birthday banner welcoming her friends


The birthday girl waiting for her guests to arrive


Face painted with Doc McStuffins -- awesome job!


The amazing birthday cake


Syringe jello shots {genius!}


The party table {don't you just LOVE the polka dots!?!}


Doc McStuffins centerpiece


Stuffy centerpiece


Bears -- each child was able to stuff their bears and dress it in a personalized t-shirt


Check up sign


Lambie and Hallie centerpiece at the gift table


The party planners and birthday girl

Thanks so much to the Glenn family for sharing their little girls' special day with my readers.  Until next time....

Related Posts Plugin for WordPress, Blogger...