Showing posts with label party favors. Show all posts

June 3, 2014

Shake it Up

My best customer is back at it again!  Her darling daughter turned six and she
pulled out all the stops to bring her dream to reality.

The birthday girl told her mom this year she wanted her party to be Shake it Up.  Don't know what that is?  It's a Disney show.  Oh wait, let me rephrase that - a cancelled Disney show.  Why mention the cancelled part, you ask?  Well because when a show is cancelled it becomes next to impossible to find the licensed products for it and that's what happened here.  Thank heavens for Ebay!  A search on the site and she found what she was looking for to make this party the awesome affair her daughter has become accustomed to.  She enlisted my help to put together a few little touches and she was on her way.

Thanks to a local kids party establishment, she was able to have a rockin' dance party -- Shake it Up style!


First things first, she wanted a cake topper.  She found one she liked and asked if I could recreate it for her.  She was able to find a few photos online of the main characters of the show for me to choose from.  After choosing the best ones, I headed off to the UPS store to have them enlarged.  Using the foam core board that I purchased from Hobby Lobby, I traced and cut out the two shapes.


After gluing the photos to the foam core and using sandwich toothpicks, I secured the characters to the styrofoam base.  Things were coming together well, but this was just the beginning - I needed to also cut her name out in foam core and paint the base orange.


Using floral wire, I was able to attach the 'Shake it Up' sign behind the characters.  Perfect!


Added on a few more decorative touches and one cake topper is finished.  Now it's time to work on the party favors.


The original party plans included a pinata but unfortunately the establishment did not allow things to be hung from the ceiling so that meant plan B.  Using the drink cups she received as part of her party pack, I created these candy cups (again, based on something she found elsewhere) that each of her guests received.


A late RSVP meant that the birthday girl would either have to forgo her candy cup or we'd have to come up with another idea.  Enter the birthday girls candy favor!  I found this cup at Michael's and after sending a few pictures of various cups to her mom for her approval, she liked this one the best.  What a time saver smart phone technology is!


Using my Oracal 651 outdoor vinyl (works best if you plan to wash the item), I personalized the cup first.


A trip to Party City and I picked up a variety of candy to add to the cup, being careful not to pick any peanut products as the birthday girl is highly allergic.  Talk about "WOW" factor!!

The day arrived and it was party time!  All pictures shown were given to me by my customer as I was unable to attend the party myself.  The birthday girl had a blast!

Party favors for the guests

Music CD's with personalized CD covers.  The back of this even had her picture on it -- too cute!

Another close-up

Photo op with the stars (and their choice of photo prop)

Birthday with flare!  Yes, I even made the cupcake toppers you see here too. :-)

Once again, I want to thank the Glenn family for allowing me to help make their baby girl's
birthday everything she wanted.  Until next year....


July 15, 2013

Happy Birthday Party Favors

Birthday parties.  Do these two little words make you a stress ridden, anxiety laced mess when you hear them?  Well, if you've spent anytime on the internet they might.  Especially if you feel like your party needs to look like all the swanky affairs that are posted on blog after blog or can be found by the thousands on Pinterest.

Confession.  I fell into that trap.  Yes, that trap that says you need to have a big party complete with the magnificent dessert table with coordinating backdrop.  I've given these parties my best effort.  Though they would never make their way into any party magazines, I was quite pleased with my son's All Aboard 4th birthday party and even the fun Hoppin' Easter Egg Hunt I threw last year.  The reality that I was stressing myself out for nothing came when my sweet boy said to me that he wasn't interested in having a 'backyard party' this year, that these parties were "boring".  Say what???  He told me he would just like to go to the pool with a few friends.  Is that it!?!  Your wish is my command!

My budget for this party was almost non-existent {we were saving for a Disney cruise} so I needed to find party favors that fit a pool theme and that parents wouldn't chuck straight into the trash.  A trip to the Dollar Tree and I found the most perfect and functional party favor and best of all everything was $1!


I searched the store not knowing what I would get, but the party gods were on my side because sitting on an end cap were these great water bottles.  SOLD!  A sturdy bottle that the kids could bring back to the pool time after time over the summer - what could be better than that?  Now what to put inside?  A little more searching and I found Angry Bird freezer pops and Singles to Go drink packets -- everything that said 'summer time' and 'pool fun'.  I was as giddy as a kid on Christmas morning.  I knew that I wanted six items in the bottles {six for turning 6...smart, huh?} so that meant I needed something else.  I decided I wanted re-freezable ice cubes which I had to get from Walmart because my wonderful dollar store hadn't stocked these this summer season.  Now that I had everything for the inside of the bottles, I needed to figure out how to personalize them.

Back in April, my best customer sent me a link that she thought I would love and she was right.  A water bottle drink holder tag from Blue Eyed Blessings.  I took this idea and used it for the bottles, with a few tweaks of course.


Using a piece of poster board from the dollar store, I measured and cut out each tag that I needed for the bottles.

Each tag measured 3" x 8"
I scored them 3 inches on one end
Using the bottom of the bottle, I traced a circle on the scored end
Using a straight razor, I cut out each circle which fit over the mouth of the bottle


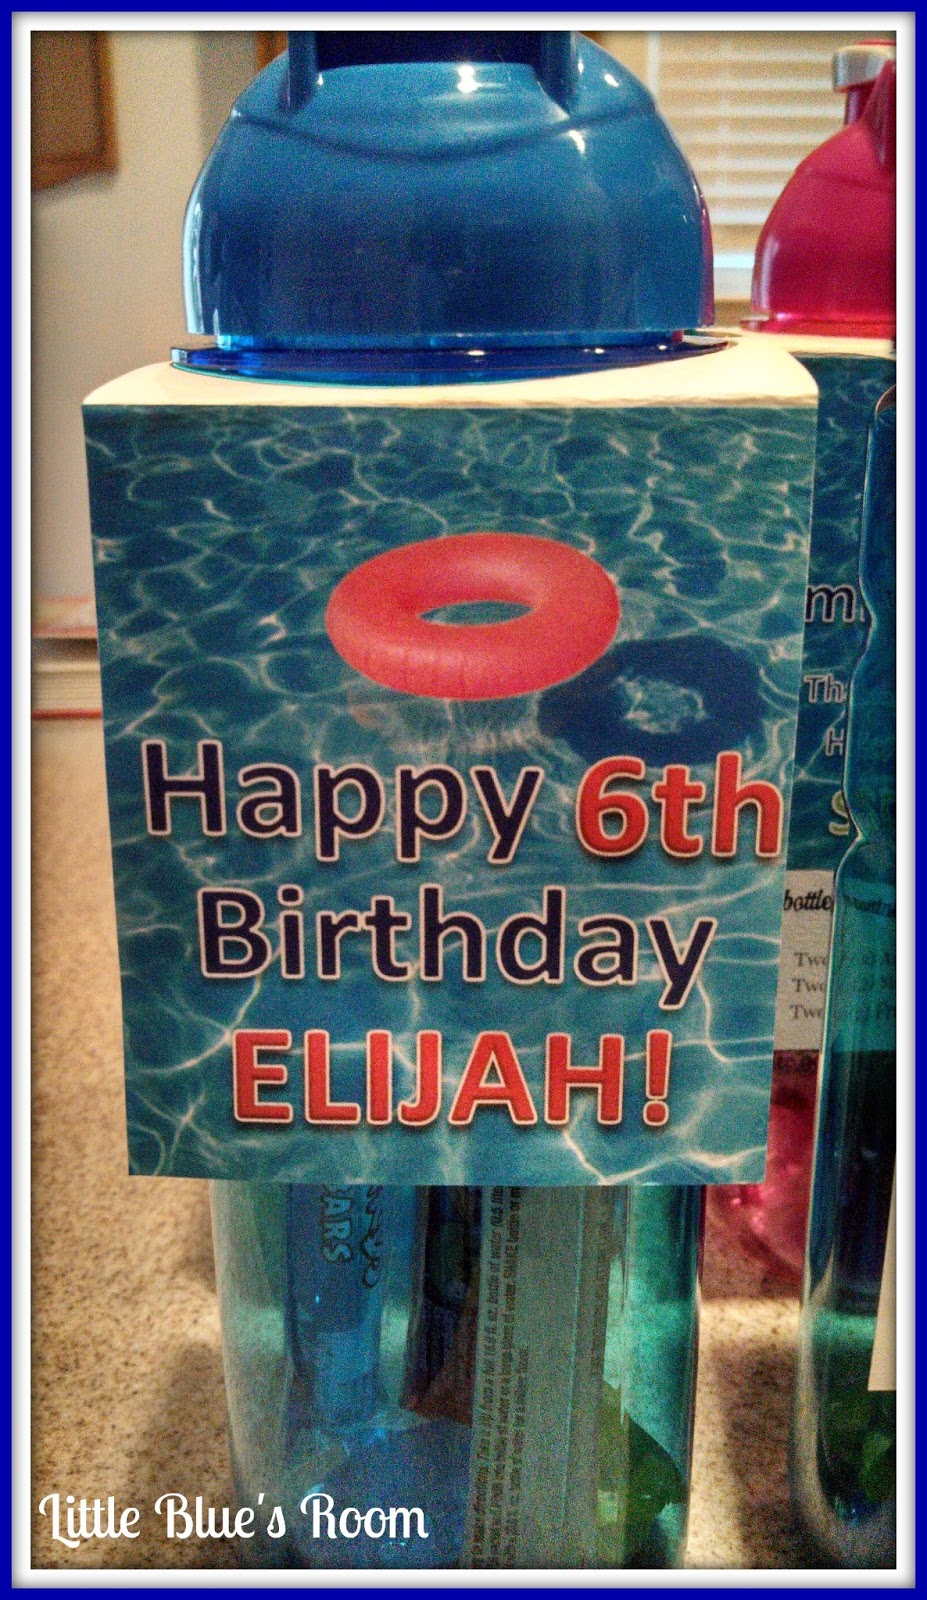
Now to create the tag itself.  I searched Google for a 'pool' picture and found this one - wonderful!  Once I downloaded it and resized it to fit the tag, it was time to personalize each one.  Using Microsoft Word I added their name and our 'thanks' message along with another smaller tag that told what each bottle contained.


Of course the birthday boy's bottle was slightly different.


Each completed bottle ready to be handed out pool side.  In the end, each one costs roughly $1.80.  An awesomely inexpensive and thoughtful party favor...what can we say, that's the way we roll! {big cheesy smile}

Related Posts Plugin for WordPress, Blogger...