Showing posts with label Dollar Tree. Show all posts

July 22, 2013

Chore Chart

As a mom, I sometimes feel like all that I do is talk.  Especially when it comes to getting my son to do what he's supposed to around the house.  I was beginning to feel like a 'Nagging Nancy'.  The constant "reminding" was causing both of us to feel very frustrated.  I knew when I found myself behaving like a person that had recently been possessed that I needed to make a change.  It was time to teach family responsibility and independence in a way that kept my talking to a minimum, gave him a sense of pride in what he could do and put me back on the 'you are a good mommy' list {if only in my own head}.

How do you do that, you ask?  A Chore Chart.  Yes, please!


For this project I wanted something simple that he could look at and easily handle himself without coming to me.  IKEA carries a magnetic board ($12.99) that would be perfect for this.  My boys and I love that place so we decided to make it a date.  To IKEA we go!

On a trip to the dollar store for something completely unrelated, I found these awesome magnetic frames.  BINGO!  This would work well with pictures of the chores inside of them.  I almost couldn't wait to get home to create them!


I used painters tape to divide the board into two spaces, vinyl for the title and full page clear labels to create the 'sun' {morning chores} and 'moon/stars' {evening chores} and it was finished and ready for use.

I still, on occasion, need to give him a gentle reminder of what needs to be done but his chore chart has given us both a way to relax and get back to enjoying what we love most...just being mother and son!

July 15, 2013

Happy Birthday Party Favors

Birthday parties.  Do these two little words make you a stress ridden, anxiety laced mess when you hear them?  Well, if you've spent anytime on the internet they might.  Especially if you feel like your party needs to look like all the swanky affairs that are posted on blog after blog or can be found by the thousands on Pinterest.

Confession.  I fell into that trap.  Yes, that trap that says you need to have a big party complete with the magnificent dessert table with coordinating backdrop.  I've given these parties my best effort.  Though they would never make their way into any party magazines, I was quite pleased with my son's All Aboard 4th birthday party and even the fun Hoppin' Easter Egg Hunt I threw last year.  The reality that I was stressing myself out for nothing came when my sweet boy said to me that he wasn't interested in having a 'backyard party' this year, that these parties were "boring".  Say what???  He told me he would just like to go to the pool with a few friends.  Is that it!?!  Your wish is my command!

My budget for this party was almost non-existent {we were saving for a Disney cruise} so I needed to find party favors that fit a pool theme and that parents wouldn't chuck straight into the trash.  A trip to the Dollar Tree and I found the most perfect and functional party favor and best of all everything was $1!


I searched the store not knowing what I would get, but the party gods were on my side because sitting on an end cap were these great water bottles.  SOLD!  A sturdy bottle that the kids could bring back to the pool time after time over the summer - what could be better than that?  Now what to put inside?  A little more searching and I found Angry Bird freezer pops and Singles to Go drink packets -- everything that said 'summer time' and 'pool fun'.  I was as giddy as a kid on Christmas morning.  I knew that I wanted six items in the bottles {six for turning 6...smart, huh?} so that meant I needed something else.  I decided I wanted re-freezable ice cubes which I had to get from Walmart because my wonderful dollar store hadn't stocked these this summer season.  Now that I had everything for the inside of the bottles, I needed to figure out how to personalize them.

Back in April, my best customer sent me a link that she thought I would love and she was right.  A water bottle drink holder tag from Blue Eyed Blessings.  I took this idea and used it for the bottles, with a few tweaks of course.


Using a piece of poster board from the dollar store, I measured and cut out each tag that I needed for the bottles.

Each tag measured 3" x 8"
I scored them 3 inches on one end
Using the bottom of the bottle, I traced a circle on the scored end
Using a straight razor, I cut out each circle which fit over the mouth of the bottle


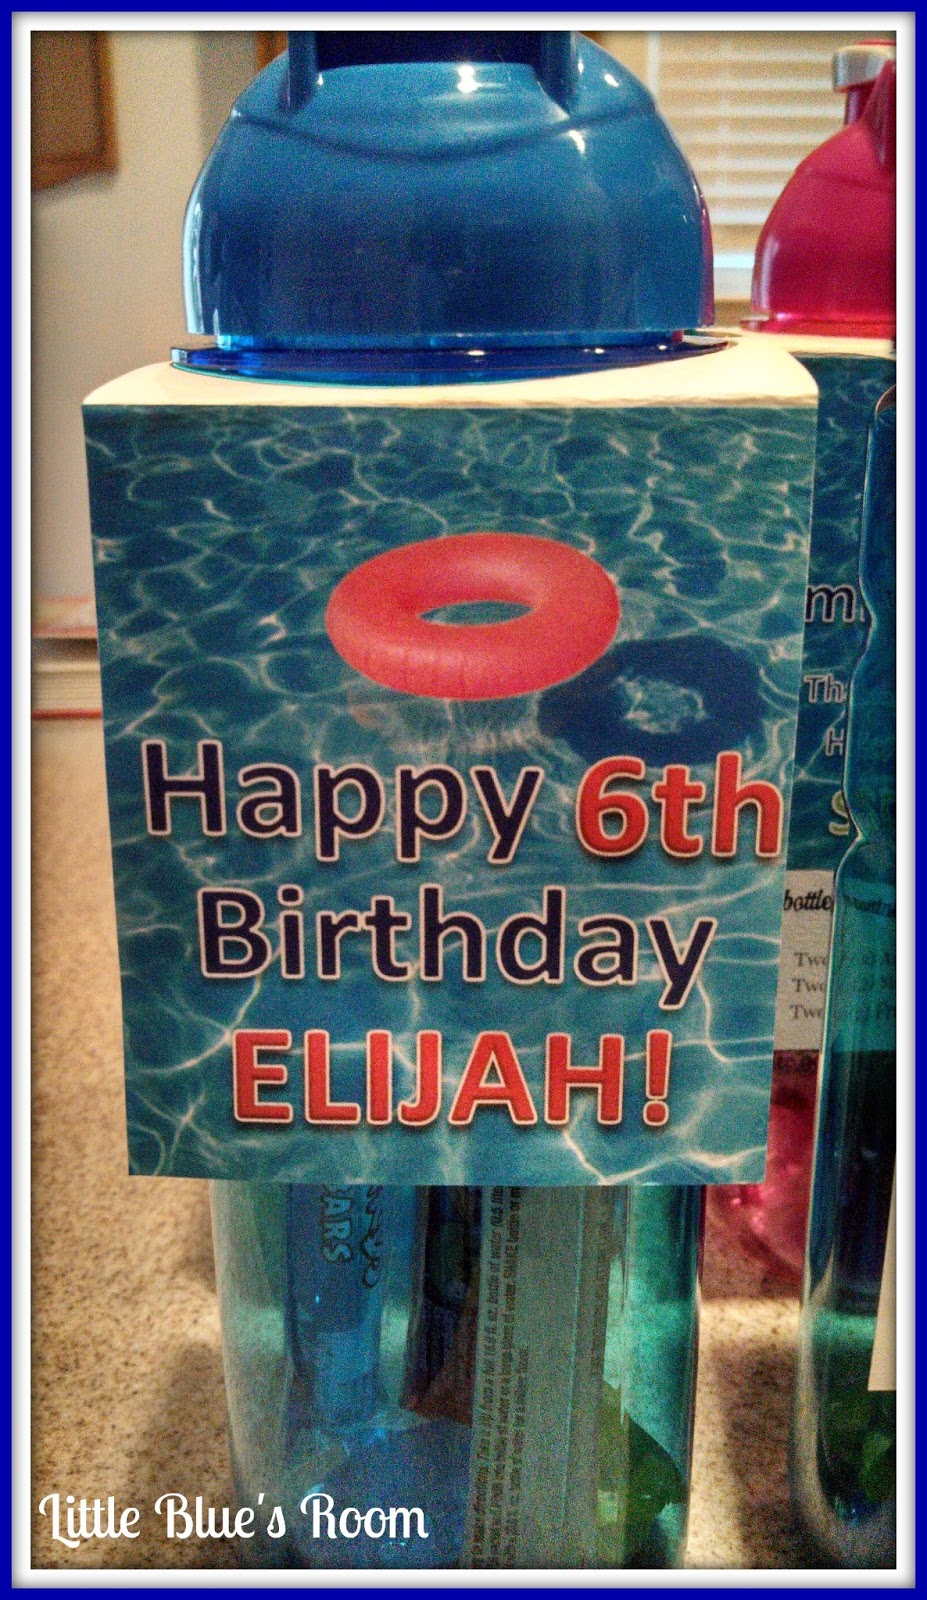
Now to create the tag itself.  I searched Google for a 'pool' picture and found this one - wonderful!  Once I downloaded it and resized it to fit the tag, it was time to personalize each one.  Using Microsoft Word I added their name and our 'thanks' message along with another smaller tag that told what each bottle contained.


Of course the birthday boy's bottle was slightly different.


Each completed bottle ready to be handed out pool side.  In the end, each one costs roughly $1.80.  An awesomely inexpensive and thoughtful party favor...what can we say, that's the way we roll! {big cheesy smile}

February 23, 2013

What I Love About You....

Valentine's Day, like many other holidays, have become so commercial.  We shuffle around for days before {sometimes even the day of} trying to pull off the best gift to show our "love" for that someone special.  Well this year I decided not to fall prey to the hype.  I decided that this year my two leading men would receive a gift that really came from my heart...and my hands.

On one of my many trips to Michaels, I found this little chipboard booklet.  I liked it right away but wasn't quite sure what I would use it for at first.  When I was considering what I wanted to do for the little prince, I decided to make him a special little book telling him the things we love the most about him.

Chipboard booklet

Checking my stash of scrapbook paper, I found some that I purchased last year - these were going to be perfect.  I took one of the chipboard pages and traced the shape on each piece for easy cut out.

Red and white stripes - traced the shape

Red and white polka dots - shape cut out

I got right down to working on the pages.  Since this was going to be for my little man I wanted coordinating colors that would be more masculine, so I opted for some black textured paper and a smooth aqua paper as well.  I don't know about you but inspiration can hit me at anytime, so the idea to have a picture of each of us moving in for a kiss with him came to me while at work...haha!

A little lovin' for mommy

A little lovin' for daddy

Our sweet boy is a great reader so we wanted to add simple sentences that he could read showing him just how much he means to us and why.


Time to put the front cover together.  Using red paper with the word "love" in black on it, I cut out the words 'Happy Valentine's Day!' using my Silhouette.  I liked the paper because I thought it wasn't too girly, but I was slightly disappointed with it on the cover because you can no longer see that detail.  Oh well, that'll be a learning lesson for the next one...haha!  The heart and key are from Martha Stewart's line and I bought them on clearance at Michaels last year.


And here are the pages all put together.  Did you notice that the ring holding the book together is a different color?  Somehow I lost the one that came with it and luckily I had some here that I bought for school.  I hope at some point it will show up and I can replace this one...so not feeling that purple with his book {giggle}.


Now that man #2 was done, time to work on man #1.  I found a bottle at the Dollar Tree that was filled with flowers and a note - a message in a bottle.  I loved this idea but sorry Dollar Tree, that note and those flower petals were going to have to hit the road.  My sweetie deserved something sweet, so I chose to fill them with conversation hearts for a different take -- 'Messages in a Bottle'.  I stopped by our local cupcakery and picked up a chocolate cupcake for him too...yum!


And a little extra added touch....

'I Love Valentines' barcode

I hope you were able to find a way to show your lovies how special they are too!


Related Posts Plugin for WordPress, Blogger...