April 8, 2012

Before Meets After ~ Laundry Room Project

We've been in our house for three years ~ new home, new town ~ and I'm just getting around to decorating some of the rooms.

Our laundry room is very small and this is the first room you enter when coming in from the garage. The rule in our house is that our shoes are left at the door {we have wall-to-wall light colored carpet}, so this space has turned into a "catch-all" for shoes and jackets - not exactly what I envisioned when we moved in.

The clutter was beginning to drive me bonkers, so it was time to do something about it. I originally wanted to paint the space, but I didn't want this project to turn into the 'never ending' project so I took it in another direction - simpler and less time. Here is where the 'before' meets 'after'....


Too many jackets!


I should be ashamed of myself for posting this picture {what a mess...lol!}, but there can't be a proper 'before meets after' without it so here it is


Lookin' good {smile}! I used my Silhoutte machine to create the words and graphics in vinyl, AND cleaned up the jackets


A close-up -- not perfectly straight, but good enough I think


A trip to IKEA and I found this great piece in the children's department and it fits beautifully. I personalized each bucket in vinyl so now no one has the excuse of not putting their shoes away properly

I purchased this cushion for it but I'm not loving it. The colors are what I want to give the space that "pop" of color it needs since I chose not to paint, but the size is still a tad bit too long so back to the drawing board on that one


I love that I'm taking the time to spruce up the place a bit. Honestly, I think it has taken me so long because I wasn't sure how I felt about living here but the longer I'm here the more it's starting to feel like home. Besides, decorating one space at a time is good for the soul {or at least that's what I keep telling myself}!

April 7, 2012

Bunny Garden

We are getting ready for Easter at our house as I'm sure you are at yours. Before time ran out on me, I wanted to get this post in to show you how to create something you could add to your Easter table. I used these for my son's egg hunt party - what a hit!

How to make a bunny garden:


All the supplies needed: one piece of styrofoam {to be cut in half}, one piece of green tissue paper cut into small squares, 6 fence pieces {4 short, 2 long}, spanish moss grass, and chalkboard garden stakes


To get started I used a large knife to cut the styrofoam in half. As you can see, it isn't completely straight {maybe I should have purchased that styrofoam cutter a year ago...lol), looks like my cutting skills need a little help {giggle}


Using Mod Podge and water I applied layers of tissue paper to all five sides of the styrofoam {I didn't worry about the bottom since it wouldn't be seen}


Completely covered


Using yellow acrylic paint, I painted all of the fence pieces {using a hand saw, I cut the two long fence pieces in half}


Using gorilla glue, I glued the fence pieces to the styrofoam


Using tacky glue, I applied the moss grass to the top of the styrofoam


I found these great chalkboard garden stakes in the dollar section of Michaels. Adding the stakes, the bunny and eggs {reused from last year's Easter decor} you have a great bunny garden

A look from the top


What an awesome addition this would make to any table decor. What I love most - it didn't cost more than about $10 to make two of them and as we all know, I love a bargain!

Happy Easter and....

April 6, 2012

A Gift Box

It's time to clean up my craft area. I don't know about others, but my craft space is bursting at the seams with 'stuff'. I've recently made the promise to myself that I will try to limit my purchases and start using that rather hefty mound of craft supplies that is threatening to take over and perhaps swallow me whole {giggle}.

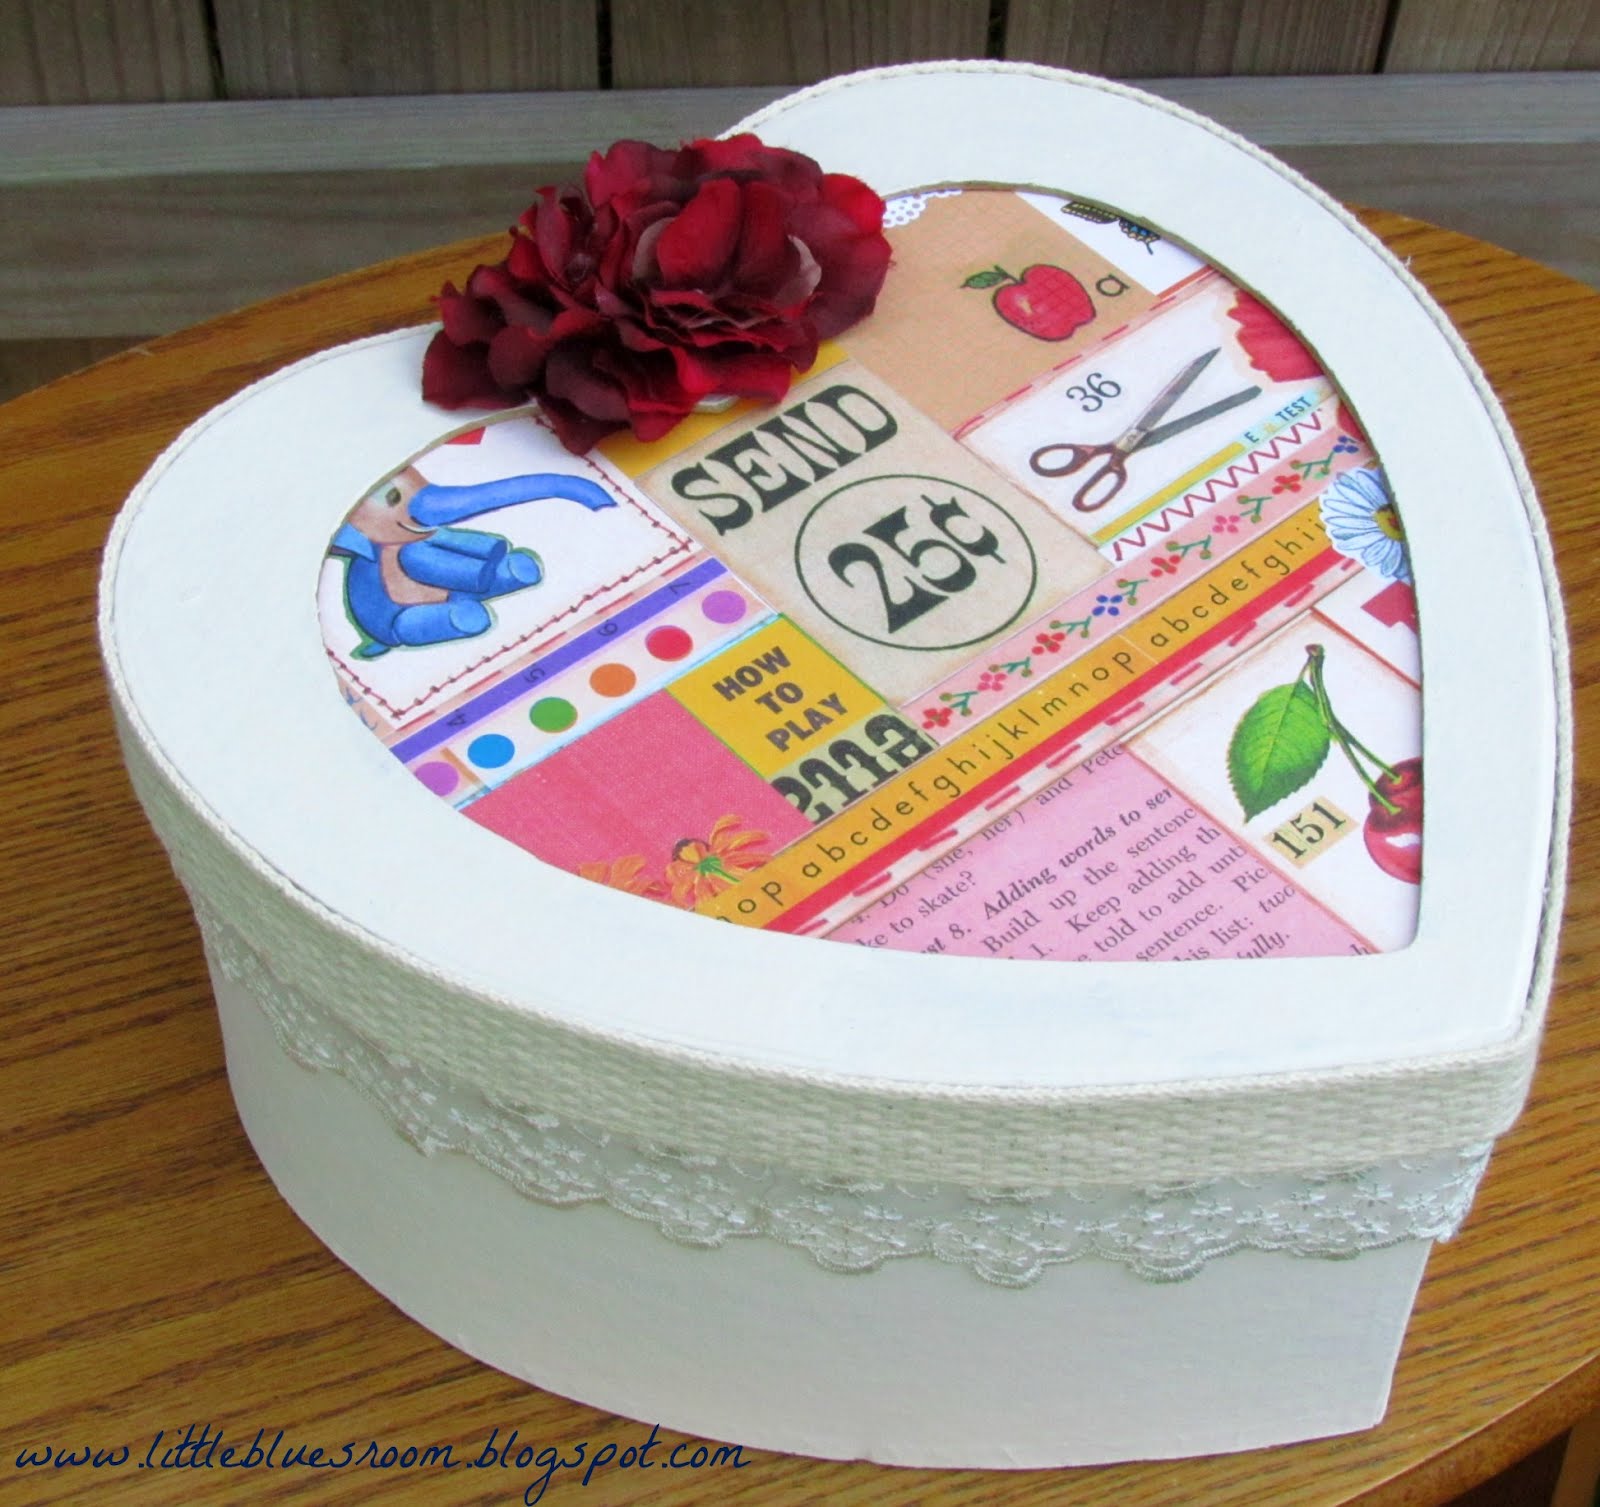
A while ago my sister gave me this great heart shape cardboard box. I completely forgot about it until the other day when I was cleaning my bedroom and found it stashed under my bed. So using some acrylic paint, scrapbook paper, flowers, lace and trim, this is what I came up with.


Perhaps this will make a wonderful end of the year teacher's gift box....just perhaps.

April 1, 2012

A Hoppin' Egg Hunt

I have been excited about doing this party for my son for weeks. After several late nights working on this {and I do mean several}, I woke up the morning of the party to the sound of rain hitting my window and all I could think was "why me"? I was sure that all my hard work was for naught because the rain continued to fall throughout the morning and it didn't look like it was going to stop. Thankfully, the weather changed by early afternoon and that meant it was party time. A quick text to our guests to have the children arrive in their rain boots and we were on our way to a fun afternoon.

Happy Easter and welcome to our 'Hoppin Egg Hunt'!


Our beautiful goody table


Delicious cupcake shooters {shooters purchased from PickYourPlum - don't you just love them!?!}


Our photo prop box. Huge "thanks" to my sister for recreating these carrots (here) for me under such short notice - cute, aren't they?


After collecting eggs and playing an egg race game, the kids traded in their collected eggs for a treat bag


Continuing to create memories for the little prince. Hope you enjoy creating memories for your little ones too!


Special Thanks to:

AndersRuff ~ "Easter Has Sprung" Printable Design Collection
The Celebration Shoppe ~ Free Easter Bunny Printables
Frog Prince Paperie ~ Free Easter Bunny Photo Props

March 23, 2012

Blog Challenge

Since beginning my blog, I've known that in order to grab the attention of my readers I needed to take great pictures of my work. So, I took my camera and began taking pictures of my crafts only to be less than thrilled with the results. Because I am admittedly naive, I thought all I needed to do was to point and shoot {how could I be so silly?} but found that I was coming no where near the quality photos that I desired.

Recently I've been saying {more to myself than anyone else} that I need to learn to use my camera AND take better pictures. Well, I'm now on the road to making that happen and I'm more than excited!

I signed up to take the SITS Girls' Pinterest Challenge - a challenge that not only helps bloggers learn how to use Pinterest to drive traffic to their blog but how to take great pics that people want to pin and who in turn might become a loyal follower of your blog.

I'm so grateful that this challenge exists and that I was able to be a part of it. The tips I've learned through this challenge will continue to help me make my blog all that I want it to be and more!

Here is what I've learned so far.

Day 1: The Rule of Thirds


Day 2: The Rule of Composition {and how to get rid of tilted horizons}


Day 3 & 4: Natural Lighting and Outdoor Photography {capturing those 'catchlights'}


Day 5: Self Portrait

I'm sure you expected a picture, right? Well, my intentions were good and honorable {snicker}. I even told my sister that I needed/wanted her help with this one...well, all I can say is this task fell by the wayside. Really, it's because I chickened out of doing it {pictures of me aren't my favorite}, but I've made a promise to at least give this a try....in the future {smile}.


Day 6: Pictures telling a story


I just love this pic and wanted to share. Pretty, right?


Using Pinterest, re-sizing pictures, and watermarking photos are also included in this challenge. I certainly feel more knowledgeable and a bit more daring {my camera scared me...sshhh, don't tell anyone} when it comes to showing off my crafts. Now back to practicing, that is if I can get my son to stay still long enough for me to get a good pic!

Related Posts Plugin for WordPress, Blogger...