Showing posts with label Ribbon. Show all posts

January 13, 2014

Simple Project Calendar

Happy New Year and welcome to 2014!

The new year brings about change.  The kind of change that has you making a vow to eat better, to exercise more, to become a better person {you know...long term goals - haha} and to be more organized.  If you are anything like me, your mental "to do list" grows with each passing day and somehow that list never seems to get shorter.  Okay let me be truthful here, I am a terrible procrastinator.  I know what needs to be done and I continually find reasons to do something else.  But the nonsense stops here!

A new year means a new me and I am not alone!  My Silhouette Challenge buddies and I are all sharing projects related to the theme of ORGANIZATION on our blogs today.  So after checking out this simple project calendar that I created to keep me on track, be sure to scroll to the bottom to browse the 35 other project inspirations that will have you ready to start your new year off right too!


For this craft I knew I wanted something simple that would allow me to see my projects at a glance.  A search of my craft space and I gathered up a piece of poster board and some thin black ribbon.  I grabbed my Silhouette machine and I was ready for business.


Using my Silhouette I created the weekly tags that I would need.  I used two different frame files and adjusted them to the size I needed.  Since I was placing these on white poster board, I gave each tag a vibrant color.  Making sure to set my machine to show the registration marks, I was ready to complete my print and cut.


If you've never used the print and cut feature, you should really give it a try.  Thanks to my wonderful Silhouette buddies and all of their knowledge, I tried it and baby I'm hooked!  My tags came out great.


Each space was measured and I used the thin black ribbon to create the lines.


Once I placed the tags in each space, I didn't like how the white border of the tags blended into the background of the poster board.  I decided to add a little more color to each block to give it a bit of pop.


After gluing each color block and tag into place and then laminating the entire thing, my project calendar is complete.


Laminating allows me to use a dry erase marker to write out my projects so I can keep track of what needs to be done when.  The great part about laminating is it can be used month after month.  How do you clean it off or make corrections?  Magic Eraser -- works like a charm!

Want more inspiration?  Can't wait to get more organized?  Well, wait no more...jump on the blog hop.  I promise you won't be disappointed!


  1. DIY Window Shutter Mail Organizer by Weekend Craft
  2. Kids' Art Wall by Tried & True
  3. Organizing Silhouette and Craft Supplies by The Happier Homemaker
  4. Simple Recipe Organization by It's Always Craft Time
  5. Put a Label on it! Herb Names for Plant Stakes by Get Silvered
  6. Super Simple Linen Closet Labels by Two Purple Couches
  7. Beware of the Animals Vinyl Toy Box by A Tossed Salad Life
  8. Child desk accessories by Architecture of a Mom
  9. Organizing & the Important of Labels by The Turquoise Home
  10. Index Card Organizer for Easier Meal Planning by Chicken Scratch NY
  11. Create Craft Room Labels by Dragonfly & Lilypads
  12. Simple Storage Solution for your Christmas Ornaments by Vintage News Junkie
  13. Organize this: DIY Planner Covers, Tags & Dividers (made with Cereal Boxes) by Black and White Obsession
  14. How to Make a Cut File into a Print & Cut by Create & Babble
  15. Simple Chest Freezer Organizational Board by Nearly Handmade
  16. Vinyl Your Kitchen Canisters! by From Wine to Whine
  17. Nursery Closet Dividers & Silhouette Cut File by Creative Ramblings
  18. Make Custom Box Templates with a Silhouette for Drawer Organization by One Dog Woof
  19. Organizing the Craft Room by What's Next Ma
  20. Vinyl Wall Calendar by Crafts Cakes and Cats
  21. Personalized Toy Storage Bins by Lil' Mrs. Tori
  22. Personalized Routine Chart by Work in Progress
  23. Blog Planner Sheet Dividers + Free Cut Files by TitiCrafty by Camila
  24. Simple Project Calendar by Little Blue's Room
  25. Dry Erase Photo Frame Menu Board + Free Cut File by Essentially Eclectic
  26. Receipt Organization with Free Cut File by The Thinking Closet
  27. Cute and Easy Labels by Life After Laundry
  28. "What's For Dinner?" Menu Planning Board by unOriginal Mom
  29. Mixing Organization and Function: An Easy Conversion Chart by My Paper Craze
  30. Why do my cookies taste so bad? A lesson in baking. by The Life and Times of a TAP
  31. Custom Drawer Dividers by Please Excuse My Craftermath...
  32. The evolution of my labeling system by feto soap
  33. Ikea Drawer labels by McCall Manor
  34. Glass Etched Vinegar  & Oil bottles by Terri Johnson Creates
  35. Organize It: Bathroom Closet by The House on Hillbrook
  36. Ombre Butterfly Magnet Board by Sowdering About


October 31, 2013

A Halloween Costume

HAPPY HALLOWEEN!!!

If your house includes little ones, I'm sure they are just about over the moon for the fun that will happen later tonight.  The little prince can barely contain himself.  It is all I've heard about the entire week and this mornings conversation was in overdrive!

Today's post is all about the fun I helped to create for my favorite customer.  Once again, she has challenged my skills in order to make her daughter's dream a reality.  This project involved sewing -- by hand nonetheless.  Now I'm sure I've said this before but it bears saying it again -- I don't sew!  Nope, sewing and I have what I consider a love/hate relationship.  In fact, for those who know me well know that sewing makes me sad.  Don't laugh...I really mean that!  So you can imagine all the things that ran through my head when my customer called me to say that she wanted me to make a costume for her little girl {say what??}.

The costume is based on this one from PBK.  They loved everything about it, except the price.

Source: Pottery Barn Kids - Super Hero Amazing Girl Costume
Cute, right?  That's what I thought too.  My second thought was how in the world was I going to recreate this.  She told me that I would only need to make the skirt, cuffs and mask because they owned a cape and crown.  Only those three, huh?  Well, I decided to jump in with both feet and I'm glad that I did.  I was extremely happy with the end product.  Was it the exact replica of this?  Hahaha, of course not!  We ARE talking about a non-sewer creating this, but it turned out magically and best of all I had a little girl who couldn't stop smiling.  That to me is always success!

I began with the skirt.  A trip to Hobby Lobby and I purchased the tulle, elastic, ribbon and this great gold shiny material that was a perfect match for the shoes she would wear.


I attached the tulle to the elastic in a pleated fashion.  I then began adding the shiny hearts {her cape has a large heart with a "C" in the middle for her name}.

A close-up of the heart
I placed each heart randomly around the tulle so they could be seen front and back then sewed them on.

Sewn onto the tulle
I included two layers of tulle for this with each layer folded in half so essentially there was four layers of tulle.  I included a layer of a satin material to create an 'underskirt' as well.

Underskirt

It was time to begin working on the ribbon band.


Now I have a finished skirt!


Unfortunately, in the end we decided to remove the underskirt...it just didn't work.

Next in line were the cuffs and mask.  For these I drew out the design and used coordinating felt to create them.


Okay, no comments about the eye holes...lol.  We realized after putting everything on that the eye holes needed to be made larger so I had to do some additional cutting.  Not the best work but her sight won't be impeded when she's out trick-or-treating.

Here is a look at Superhero Corrine in her entire outfit:


Could she get any cuter!?!  She was in love...and I do mean in love.  Can't you tell by this pose?  Thanks so much to her mom for sewing the heart/"C" onto the leotard to put the finishing touches on the top.

Now she's all ready to be Superhero Corrine and I'm so glad I was able to be a part of making that happen!

Hoping that you and your little one(s) have a safe and fun Halloween.

TRICK OR TREAT!!!


Where we like to party!


October 7, 2013

Happy Anniversary!

Hey everyone, I'm back!!!  It's been over a month since I last posted...did you guys miss me?  Well, I've certainly missed you!  A month away gave me time to just slow down a bit and take a few things off my plate for a while.  Now that I'm feeling more refreshed, I'm back and ready to jump right in.

Today's craft comes to you via an Evite I received from a mommy friend of mine.  Her parents just celebrated their 20th wedding anniversary.  The Evite wasn't to attend a party for them, as they would be out of the country on their anniversary, but to do something much more special for them.  The 'invitees' were asked to send them an anniversary card.  The plan was for them to return home and see all the wonderful anniversary wishes from their friends and family.  They are blessed with amazing children who thought up this wonderful idea and it gave me such 'warm and fuzzies' that I couldn't wait to send my card.

Of course the crafter in me would not allow me to go and buy a card from the store.  For this special occasion I needed to make something just as special.  Here is what I created.

Happy Anniversary Richard and Libby!  Here's wishing you 20 more glorious years together!


The front


The inside

*** 10-08-13 EDIT ***

What a wonderful surprise for Libby and Richard.  Read on to see what they had to say about this heartfelt anniversary surprise party!

Dear Friends and Family,

Thank you all for your greetings and good wishes in celebration of our 20th wedding anniversary. 

When we returned from our trip  we had an “official” US Postal Service tub of mail waiting. Bills and catalogues, right?  We had no idea what was going on when found greeting card after greeting card as well as emails and phone messages all from very special friends and family!  

You would have enjoyed watching a couple of jet-lagged confused travelers trying to understand why and how. One of our neighbors had to explain that it was an Surprise Anniversary Card Party.

Thanks to our adult children for their creativity and effort in putting this together.

With love,
Richard & Libby

They were even kind enough to include a picture.  I'm so happy that they were surprised and that their "party" was such a huge success!

Side note {well because I just have too!}: It's too bad the post office couldn't keep from destroying the key -- next time I'll be sure to put "fragile" on the envelope.  Lesson learned.  


February 14, 2013

Valentine Love

UPDATE: My lovely Valentine carton made the cut on the CSI Project!
Visit thecsiproject.com
Happy Valentine's Day lovies and Happy 2nd Blog Anniversary to Little Blue's Room!

I can't believe that it was two years ago that I decided to begin this journey.  Okay, here is the honest truth -- I had NO idea what in the world I was getting myself into...LOL!  I'm not sure that I have a much clearer understanding two years later but I continue to try to learn as much as I can and I think as long as I don't give up {which I've thought about doing} then I'm moving in the right direction.

Well, that's enough about that!  Let's get down to what this day is truly ALL about -- Valentine's!  I have been busy over the last few weeks working on Valentine's for my best customer {and my little guy too!}.  She asked that I create something fun for her daughter's class.  She spent some time cruising the internet and came up with a couple examples that she loved.  I had my marching orders and I got right to work.


O"fish"ally the Best!

She decided that these would be perfect for the kids.  Her little girl is going to love delivering these little fishy's to school {pun intended...lol}!  Now something a little different for the teachers:

'Bee' Mine!

I am so pleased with them both, they came out bee-u-tifully!  Of course the true test is if the customer likes them and she does too {major score}.

I couldn't put my supplies away just yet because the little prince would need some for his class as well.  I wanted something different, out the box of sort and I found it -- thanks to the Silhouette blog here.  Check out this great and simple Valentine!

Not your typical Valentine for sure.  I used an almost burgundy textured card stock for the carton and paired it with a cream white textured card stock and coordinating pattern paper to create the hearts {there are two of them; white on the bottom and patterned on the top}.  I chose to pull out the green color to use for the arrow.  I then needed to fill the bottom with basket shred so the candy bag would sit up high enough.  Add another heart as a tag {not shown} and they are ready for delivery.  Cute - check!  Valentine-y - check!  Love it - check, check!

I hope that you have had a great time creating memories and showering love on those that mean the most to you this year.  From my family to yours -- Happy Valentine's Day!


Where we are partying!

Visit thecsiproject.com

November 26, 2012

Christmas Countdown

Christmas truly is the most wonderful time of the year!  I love everything about the holiday - the cooler weather, the decorating, the time with family and friends - simply everything about Christmas makes me happy.  Now that I'm a mom, I love experiencing the holiday through the eyes of my son -- his excitement is contagious!

Anyone who knows my son knows that he has a love for numbers {I see a math whiz in the future}.  Now that he's older and in "big school" I thought a great way to gear up for Santa's arrival would be with a countdown calendar.  There is nothing like the nearly unbearable anticipation as you wait for the big day {and hopefully big presents} counting down to the magical moment when Santa visits.  Here is our countdown to Christmas....

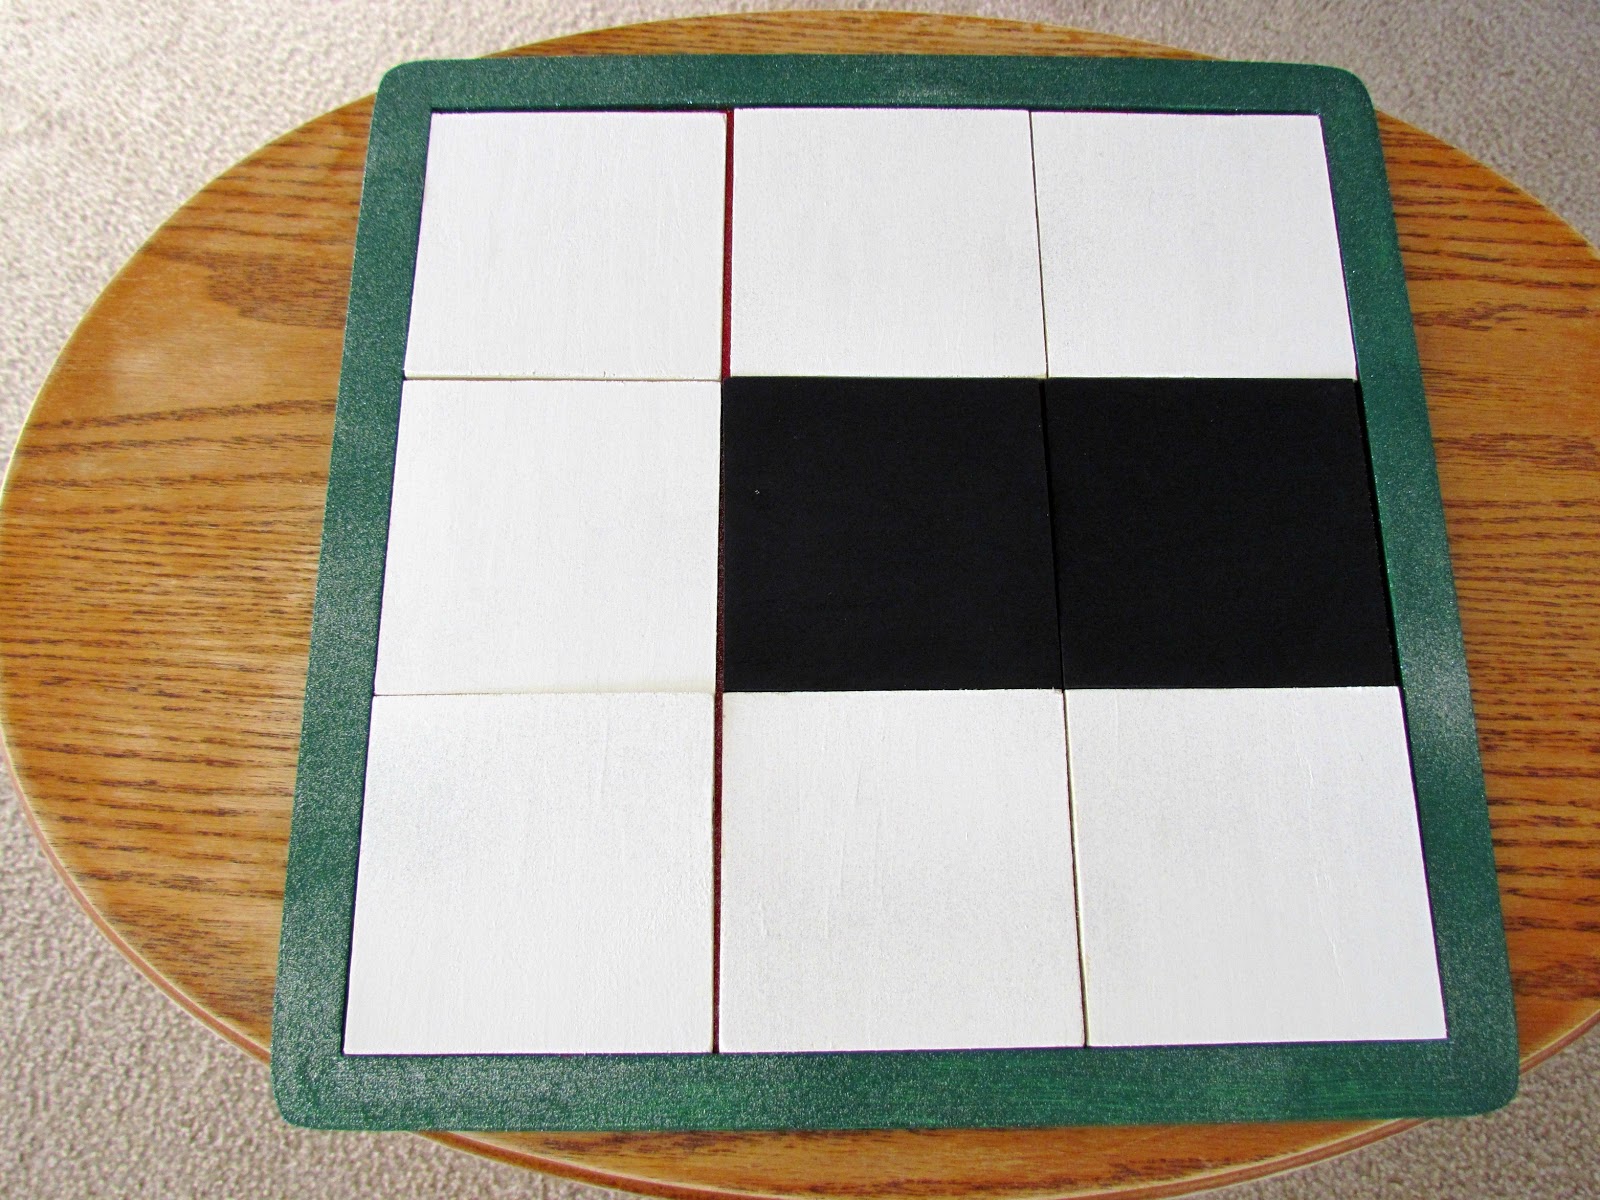
I began this project by using a wood tile board that I bought from Walmart a while back.  I thought these would make great craft projects for the future so I bought three of them, one I used on my It's Fall board.  As it is with many of my crafts, I try to use what I have on hand (if at all possible) so this craft project didn't cost me a thing {dancing a little 'two step'...lol}!


I painted the base red, the frame green and seven of the tiles in a creamy white.  The remaining two tiles I spray painted with black chalkboard paint.


Searching through my craft supplies I found a can of glitter spray paint.  I thought since this is a Christmas craft why not add a little sparkle.  I've never used this product before so I had no idea how it would turn out.  The spray was a little uneven so there are places that are a little more "sparkly" than others, but I think it adds character to the board, don't you?


I wanted to add words to it so I pulled out the vinyl and my Silhouette machine and got to work.   Seriously, buying the Silhouette was the best investment I've ever made in my crafting.  I don't think I could love anything {inanimate that is} more than I do this machine...haha.  I also decided to design one of the squares into a Christmas tree using felt and the other into a gift using ribbon and a button.


With a little hot glue on the back of each well placed square, I have my finished Countdown to Christmas board hanging and ready for use!


Note: I took my son's chalkboard eraser and "erased" over the two chalkboard squares before writing on them in order to keep the numbers from making a permanent mark.


Now we are ready and I for one can't wait for the big day {as it also happens to be my birthday!}  Here's hoping you and your family have a great countdown to Christmas.

Linking up with these great parties:


Dixie n Dottie

Related Posts Plugin for WordPress, Blogger...