
 The board and scrapbook paper
 Paper cut to size and the area cut out for the vinyl chalkboard
 Painted the edges with a pearlized black acrylic paint, making sure to paint a small edging around the top of the board
 Covered the chalkboard with painters tape while I sprayed with clear acrylic
 Found these great beads on clearance at Hobby Lobby to use for the handle. I placed them on galvanized wire and used jewelry wire to create the design.
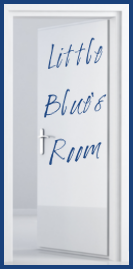
 The finished board and beaded handle
Perfection? Not quite, but it's certainly close - or at least closer than the last one (LOL!). As with anything, there are lessons to learn and this project is no exception, but I'm pleased and I hope my sister will be too!


6 comments:
That came out rather nice! Good work!
Thanks Amandine! :-)
How fun! I love the little chalkboard section and the beaded handle. How creative!!
Thanks Amy! I love your site and it's because of you that I got the nerve to even try it (smile).
Great idea! I homeschool and this is a great project for the kids to make for a loved one. ;)
Thanks! It would work well with magnet paint or even dry erase vinyl.
Post a Comment