Showing posts with label Picture Frame. Show all posts

November 18, 2013

A Pinterest Party!

I LOVE Pinterest!  I am such a visual person that this site is like Christmas all year round for me. If I can see it, then I can make it {or at least my version of it}.  I've been pinning and planning {mostly in my head...LOL!} for over a year now.  Part of the plan involved getting friends together to create something, a ladies night out of fun and crafting.  I mentioned this to my friend Tammy and she was all for it.  She was the push I needed to actually make it happen.  So this weekend, we threw our very first Pinterest Party!

We all know that a good party is about the spread, right?  Well, this was an evening affair so we offered light refreshments with a Pinterest inspired theme -- check it out!


Our lovely food table
Of course a party for me is as much about the small details as it is about the activity itself so I took the time to throw a little fun into the evening.

Pinterest Water
I created Pinterest water bottle labels using Microsoft Word, removed the other labels and replaced them with these.  Such a simple thing but a big impact.  Perfect!

Snack cups
I found this idea, where else, on Pinterest!  Cupcake baking cups filled with Chex mix and red M&M's.  The logo in the middle of the plate certainly makes it 'Pinterest'ing, doesn't it?  {smile}

Pigs in a blanket for those who might feel hungry after all the crafting

Pigs in a blanket with their own individual Pinterest toothpick.  Don't you just love these added touches?  I know I do!

After a little snack, it was time to get down to the business at hand -- crafting!


One of the ladies was a complete novice when it came to crafting and she even mentioned how "out of her comfort zone" she was coming to a crafting party.  We reassured her that all she had to do was keep calm and craft.  We promised that it would be okay and it was.

The two crafts for the evening
Tammy's dad had these amazing mason jars that he no longer needed or wanted.  Score!  Free materials -- the beginning of a wonderful craft project...HA!  Now if you've spent any time at all on Pinterest you know that there are pin after pin of crafts that involve them.  We chose to create a Fall inspired craft with the jars then picked a Christmas inspired one that involved a $1 paint brush from Walmart.


The ladies got right down to work.


Cathy thought that she was in over her head, but she Mod Podged like a pro!


Thasha was excited that one of the crafts involved Mod Podge -- a medium she had been dying to try out.


Rachel is a crafter in her own right, she makes and sells bows at her Etsy shop so she felt right at home with this craft.


Tammy was so inspired by the paint brush project that she decided to make two.


The frame used as a backdrop did double duty at this party.


But I have to show the comment love first.


It was time for our photo-op.  Since the party was at night and we were in my basement with overhead lights, it made taking good pictures a bit challenging for me {sorry, I know I REALLY need to learn to use my camera...lol}.  So when we asked Rachel to take a pic she suggested laying down on the ground to try and reduce the shadow.  As you can see, that didn't work because we were laughing too hard to be serious about it.  I'm sure Tammy is going to kill me for sharing this one but I just had to.  I promise not to share the others of us though...way too embarrassing!

Co-hosts
After the giggles were over, we got ourselves together enough to take one standing up.  I think we look great, don't you?


Here are two of the paint brushes.  Cute as a button, right?  Everyone had such a great time making these and can't you just imagine how cute they'll look added to a decorated Christmas tree?

Thanks ladies for joining us.  See ya at the next one!
We had so much fun that Tammy and I are planning our next party.  If you've been thinking about doing something like this, I say jump right in and give it a try....I don't think you'll be disappointed.

October 11, 2013

More than a Frame

I found these frames in the clearance section of Michael's after Christmas.  With a price of about $2 each, I decided to pick up two of them.  I wasn't sure what I'd do with them but the "hoarder" in me was having a hard time leaving them in the store.  What?  You caught that?  The subtle reference to myself as a hoarder.  Yup, sure did.  Hi, I'm Angela and I'm a crafting hoarder.  First step to recovery is admitting, right? {giggle}


They were unfinished frames, so I grabbed a can of spray paint and got to work giving this beauty a little color.


Nothing in my crafting is ever quick and easy {smile}.  So after a few days of looking at this and wondering what else to do with it, I was inspired by something I saw from the online store Pick Your Plum.  I added some thin jewelry wire and attached it with hot glue and small pieces of felt.


I love the way it turned out.  It has many possibilities -- holding jewelry, Instagram pics, hair bows, etc.  It is currently hanging on my projects board {which is also waiting patiently for its turn to be transformed as well} but I have to be honest, I keep looking at it like I could do more with it.  You know what that means, right?  You'll just need to stick around to see what update I come up with!

August 21, 2013

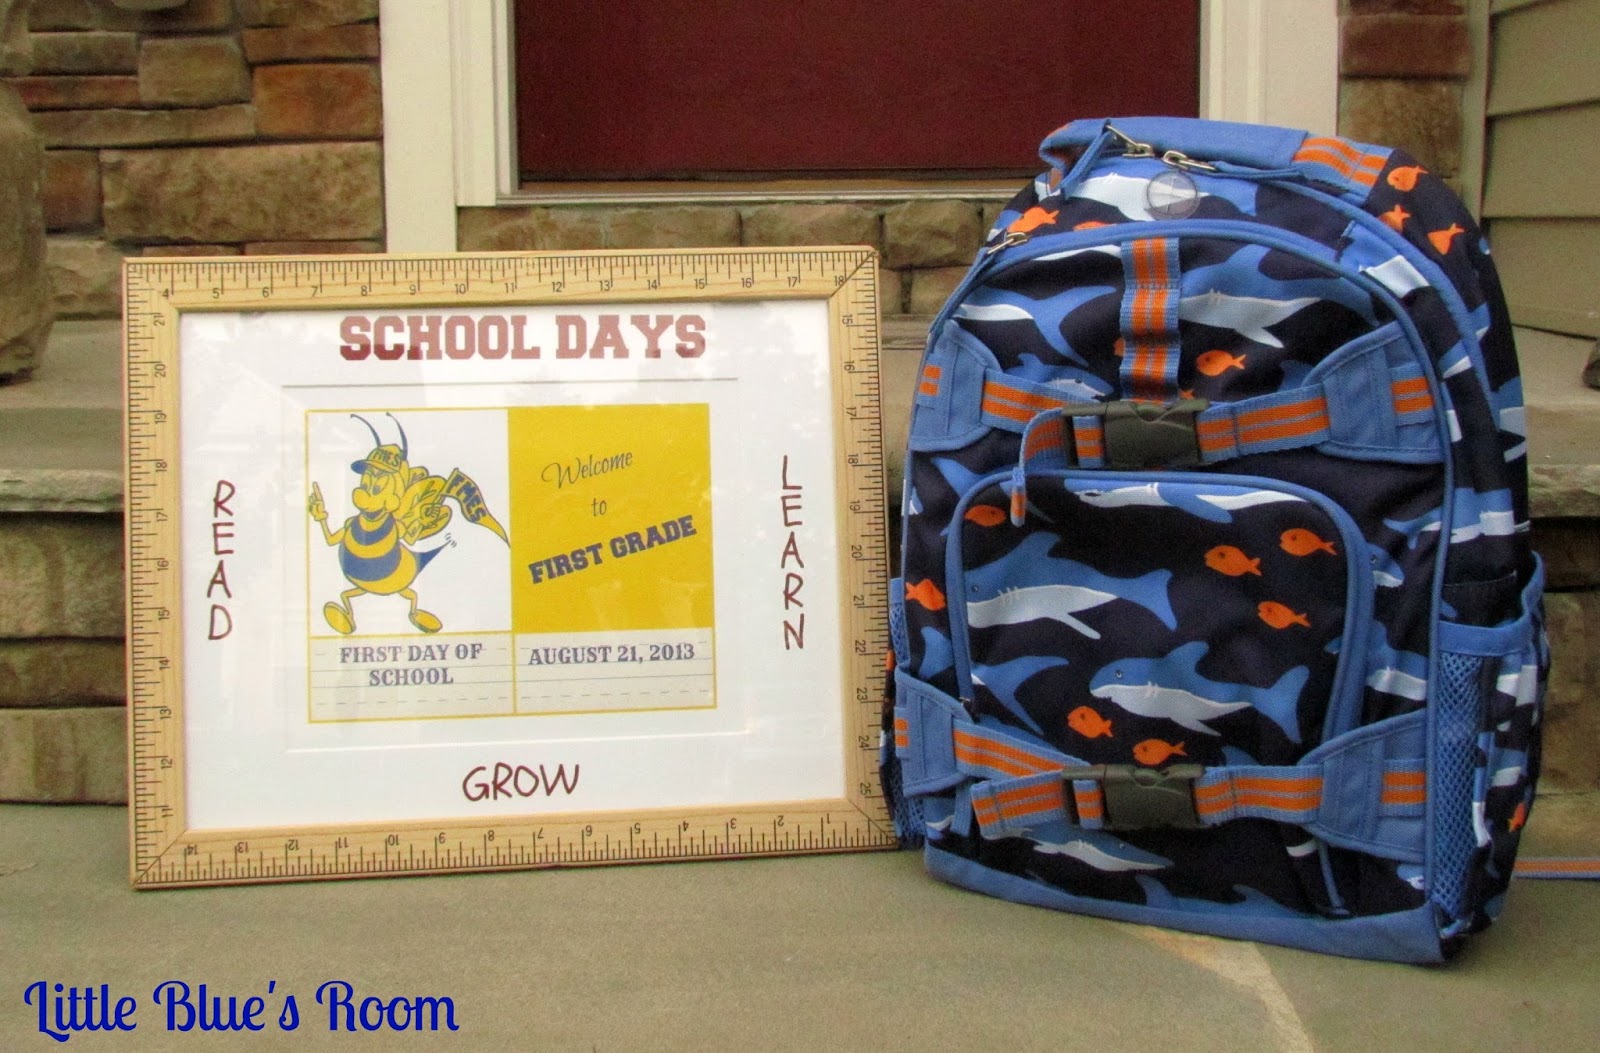
Welcome to First Grade!

Our summer is officially over.  Those lazy days filled with late bedtimes, relaxed schedules and living at a slower more enjoyable pace have ended and we are headed into another wonderful albeit busy school year.

Monday afternoon we attended Open House/Meet the Teacher and you could see the excitement in my little guy as he ran up to classmates he hasn't seen all summer with a huge smile and ready to share information about what's been happening in their time away from one another.  We entered his classroom, found his desk and learned what could be expected this year -- we even got the chance to snag a picture of the school mascot!


Last year I decided I would start a school tradition, first day of school pics which you can see in my Back to School post.  So to keep with tradition, I redesigned his sign to welcome him to first grade.

I searched the school website for a picture of the mascot and saved it to my computer.  Using PicMonkey, I used the 'Create a Collage' feature.  After playing around with different collages, I decided the one that worked best was 'Square Deal'.  I wanted this year's sign to reflect the school itself, so the first order of business was to change the background color to yellow.  I then uploaded the mascot picture and placed it in the first square.  I had to make some adjustments to the size of the squares because the picture was so large and I didn't want to loose any of it with a crop.  Once I was happy with it, I moved on to adding the very cool school paper 'Swatch' feature to the bottom two squares.  Perfect!  Now, it was time to click the 'Edit' button in order to add the text.  In the second square using the 'Bilbo Swash Caps' and 'Impact' fonts, I wrote "Welcome to First Grade" in the coordinating blue color.  In the two bottom squares, using the new 'Freshman' font I added the text "First Day of School" and the date he started.  Aaa-mazing!


I printed this on a piece of cardstock, replaced last year's sign with this one and look....another memory in the making!


 Happy first day of school my little prince, I know this is going to be an awesome year for you!


Where we like to party!

Visit thecsiproject.com

August 13, 2013

Guest Post - Life After Laundry

Guess who has her first guest blog post?  Yup, you guessed it...it's me!  And let me just say that I am more than excited about this opportunity.  Growing as a blogger feels really good!

I met Brenna from Life After Laundry at a blogging conference this past May.  She is quite an amazing crafter/DIYer and seriously, I'm totally jealous of her sewing ability {she has offered to teach me how to sew, but well...you all know how I feel about my arch nemesis - LOL!}.

With a new linky party, a craft challenge this month and oh yeah...her family to take care of, she is a very busy lady.  Since her schedule is so full, I jumped at the chance to do something I've honestly been afraid to do...my first guest post.

With school about to start, I resurrected my Back to School post to get everyone prepped and ready for a new school year.  Be sure to hop on over and check it out and be sure to let me know what you think of my very first Guest Appearance.  {smile}


August 22, 2012

Back to School

This week I witnessed the end of one era and the beginning of another as I prepared my little guy for his first day of Kindergarten!

Though he has been ready for this for about a year {LOL!}, I still can't believe how FAST this time has come. I was a proud mama as I watched him enter the school and his classroom with the confidence of someone who has been doing this for years. After wiping away a few tears, I gave myself a "pat on the back" for a job well done in helping to instill in him a sense of wonder, curiosity and a desire to learn as he begins his educational career outside of our home.

Of course an occasion such as this requires some "craftiness" {giggle}. The blogsphere is filled with so many cute 'back-to-school' crafts but the one I love and found to be pretty simple was the "First Day of School" printable {I've found our new school tradition}. The Goodwill frame required just a little wood glue on the corners and I changed the original matting out for a more simple single mat. Using my Silhoutte machine, downloadable free fonts and vinyl, I created the lettering.

I LOVE it! It was simple and only took me about an hour to create and now I have something that will see us through high school! Here's hoping your child(ren)have an AWESOME first day of school too!


June 28, 2012

Collage Art Frame

If you are anything like me, you have at least a million photos on your computer. Okay, perhaps 'a million' is a bit of a stretch but I certainly have a LOT of them! So what do you do with them? Scrapbook with them, frame them, or simply forget about them...you know 'out of sight, out of mind'? That's the problem that I've run into and I wanted to make good use of at least a few of them, but how? Cruising through Pinterest, I noticed several projects that involved collages {ding, ding...I hear that creative bell going off}, so I decided that would be a great way to use some of those pictures.

Well, I've been working on my bedroom project for some time now. I realize that even with the best intentions this project is going to take way longer than I'd like, but I digress. The plan involves some fun things to go up on the walls - enter my collage art frame.

I purchased this great frame from 'the Will' {Goodwill for those not in the know...lol} and I thought it would make a great re-do project.


The center was painted with bears and had this great rough texture to it. Now, if I were a better artist this would have been gorgeous with a new painted design, but since I'm not and I know my artistic limitations I decided it would have to be designed differently.

The first thing to do would be to repaint the entire thing. Using both spray paint and the wall paint I used in my prayer board project (here), I gave the frame a new look.


I chose to use photos from a recent trip home and a day spent with my sister and son. We had such an awesome time that day and what a wonderful way to commemorate that time.

After editing, cutting and placing the photos, I used mod podge to glue and seal them. Here is the end result.


Fun, cute and an inexpensive way to add a little character to my bedroom - I love it!

October 14, 2011

Before Meets After ~ Picture Frame

A trip to The Goodwill landed me with my next 'Before Meets After' piece - a 5x7 solid oak wood frame. Since Halloween is only a couple weeks away and I have so many crafts that I would love to do (but unfortunately won't get to before the holiday) I thought this would be the perfect piece for a simple transformation.

Switchy-Witchy.....


The frame

Look at the price tag - gotta love $.49!

Spray painted it black

Cut a piece of white textured scrapbook paper to size

Using my Silhouette and the free shape of the week, I cut out the witches hat in both black and orange

I created a witches hat using pieces from both cutouts and used some great rub-ons that I found in Target's dollar bin last year and you have.......


A great Halloween sign

Simple and easy! I can't think of a better way to add festive holiday decor to your home without breaking the bank.

Related Posts Plugin for WordPress, Blogger...