Showing posts with label spray paint. Show all posts

October 11, 2013

More than a Frame

I found these frames in the clearance section of Michael's after Christmas.  With a price of about $2 each, I decided to pick up two of them.  I wasn't sure what I'd do with them but the "hoarder" in me was having a hard time leaving them in the store.  What?  You caught that?  The subtle reference to myself as a hoarder.  Yup, sure did.  Hi, I'm Angela and I'm a crafting hoarder.  First step to recovery is admitting, right? {giggle}


They were unfinished frames, so I grabbed a can of spray paint and got to work giving this beauty a little color.


Nothing in my crafting is ever quick and easy {smile}.  So after a few days of looking at this and wondering what else to do with it, I was inspired by something I saw from the online store Pick Your Plum.  I added some thin jewelry wire and attached it with hot glue and small pieces of felt.


I love the way it turned out.  It has many possibilities -- holding jewelry, Instagram pics, hair bows, etc.  It is currently hanging on my projects board {which is also waiting patiently for its turn to be transformed as well} but I have to be honest, I keep looking at it like I could do more with it.  You know what that means, right?  You'll just need to stick around to see what update I come up with!

July 12, 2013

Chic Drink Stand

As we prepare to do some renovations on our backyard, I've been thinking about colors and how to decorate our new patio space.  The truth is, I wish that we had the budget to buy all new furniture and accents but I know that's not possible.  Time to think of ways to make a chic, beautiful and relaxing space on a budget.

While we wait for the rain to stop {Is there a monsoon season in the south?} so our concrete contractor can get here to lay the slab for the backyard patio, I've decided to begin our design with some simple accents.  This one has been on my radar for almost a year and I finally got around to getting it done -- my chic drink stand.


I began this project with a trip to Lowes.  I found a 6 x 24 board used for playground equipment - perfect size for what I needed.  From there I headed over to find the tiles that would fit on top.  The tiles are basic kitchen/bathroom tiles {sorry, forgot to take a pic of them}.  The wooden balls I purchased at Hobby Lobby knowing they would make great legs.


I spray painted each piece in a flat black paint.  I love how you can still see the grain of the wood.


At this point, I needed to enlist the help of my knight and shining armor to attach the handles.  He is much better with power tools than I am and his attention to detail would ensure that the handles would be put on properly, something I was a little worried about if left to do this part on my own.


Measuring to make it even and to make the holes line up for drilling

Oh how I love a man with power tools!


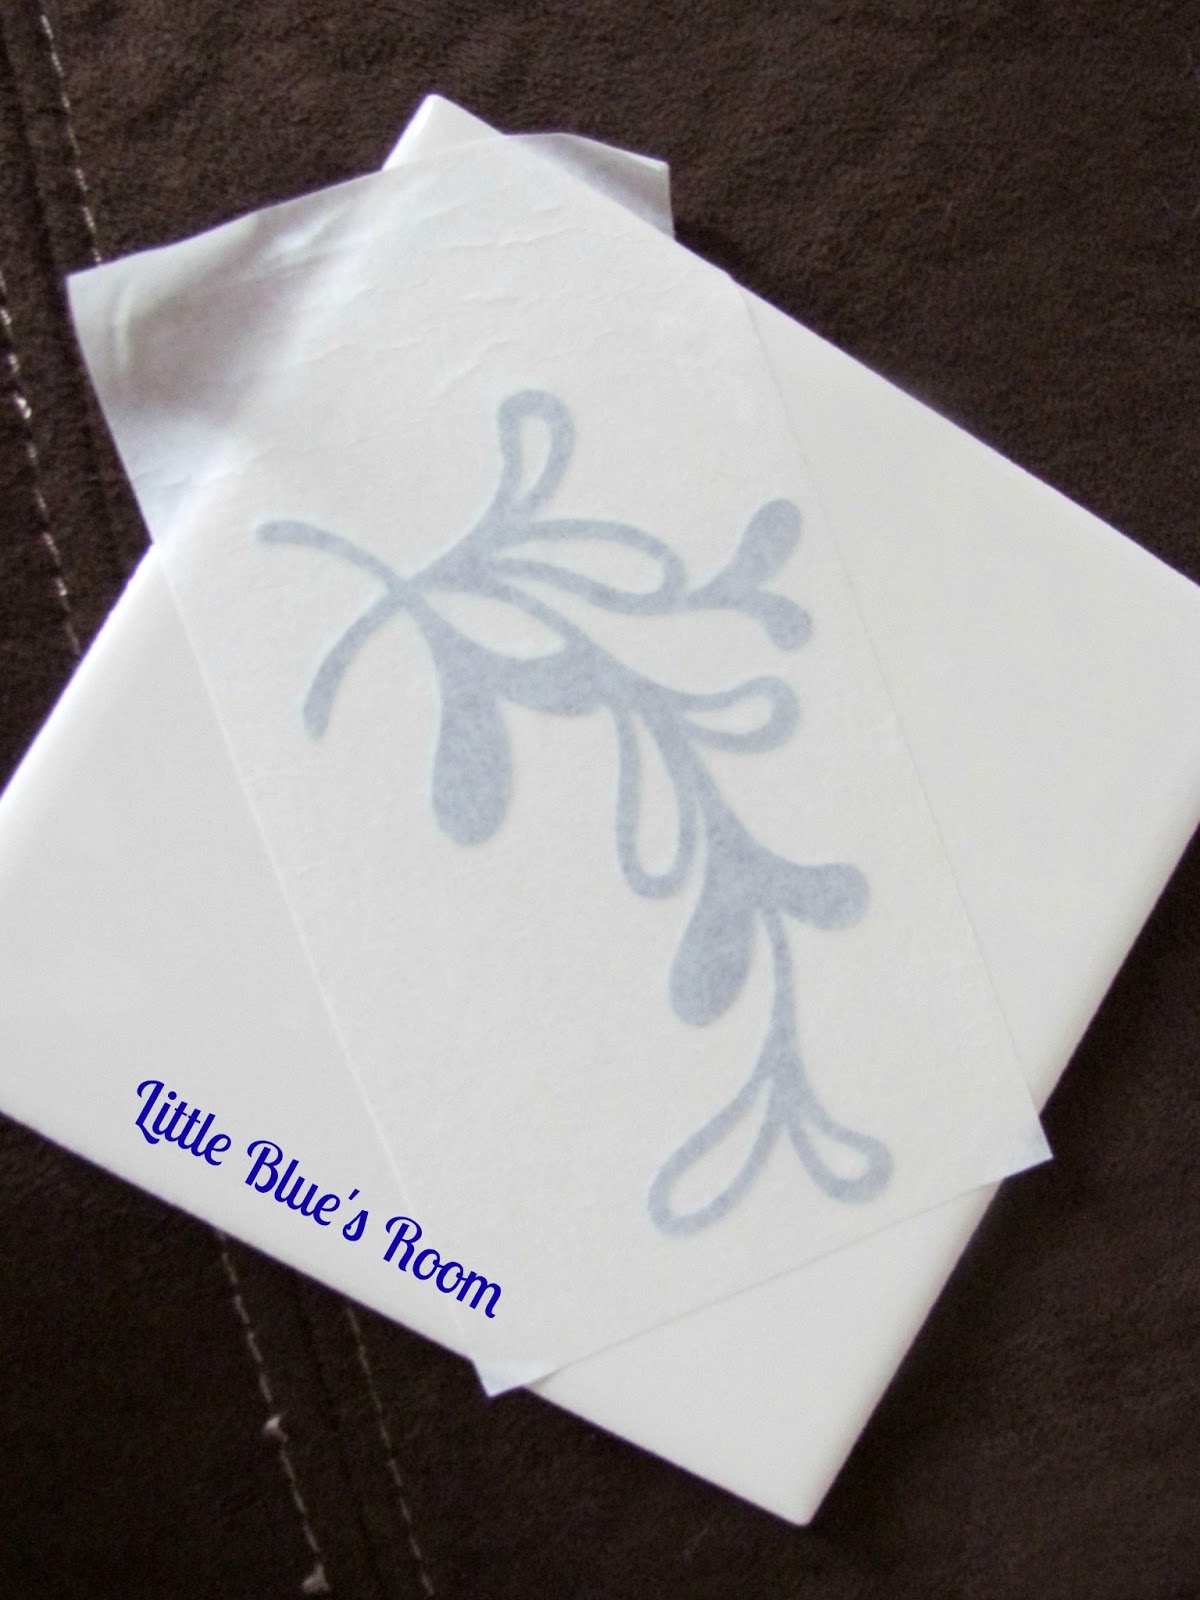
Using my Silhouette machine, I found two great flourish designs that I loved.  One of them I also used on the Doll Club Cards.  I cut two of each design using vinyl and placed them on each of the tiles.


Vinyl transfer on each tile

The colors I want for our outdoor space are turquoise, coral and pale yellow.  We tend to shy away from color -- a habit I'm trying to break.  I chose a great turquoise acrylic paint and used a foam stamping brush to "stamp" the paint on each tile.  I wanted the texture and the more 'uneven' look of the paint on each one.

Stamping over the tile and vinyl

Completely covered 
TIP: Remove the vinyl while the paint is still wet to keep it from messing up the design.

Removing the vinyl carefully

I measured {you can see a faint pencil line} to make sure that I put the 'legs' in the right place and attached each one using Gorilla glue.


Remember that tip I just gave?  Well, let me show you what happens if you don't get all of the vinyl off when the paint is still wet...ugh!  I considered redoing the tile but decided against it.  I think it gives it character, so it stays {truth: I was too lazy to do it again...LOL!}.  I attached each tile using Gorilla glue as well.  I didn't measure the space for the tiles, just gave it a good eyeballing {Is that a real word? Guess it is now...lol} to make them even on the board and let them sit for half a day to set before moving the stand.

Dried paint is NOT your friend!

I'm so proud of the way this turned out.  An accent that will not only be cute but functional and of course we all know how important cute is!


Where we like to party!


July 8, 2013

Monster What???

Have you heard of Monster High? Until a week ago, I had not. Being the mother of a 6 year old boy, this was outside of my knowledge base but apparently is all the rage with preteen girls. If you happen to have no idea what I'm talking about, allow me to give you the official "411".

According to Wikipedia, Monster High is "a fashion doll franchise created by Mattel in July 2010. The characters are inspired by monster movies, sci-fi horror, and thriller fiction therefore distinguishing them from most fashion dolls".  Who knew?  Certainly not I...LOL!

Anyway, my best customer was in need of a gift for a family member and this happens to be the party theme. She found exactly what she wanted from a party featured on Catch My Party.  She sent me the link and I was on my way.  Here is my version of the Monster High party centerpiece.


Image backed on foam core board

The image was blown up to fit an 8.5 x 11 sheet of paper.  I cut it out and traced it on foam core board.  Using a straight razor I cut the shape out of the board then glued on the image.


Blingy!
I wanted to add a little something to it and what better than a little bling, right?  Every girl, even girl skeletons, like a jewel or two. {smile}


The original version looked like it was filled with tulle but my customer chose tissue paper and though I was a bit apprehensive at first, it turned out to be the perfect accent to it.


I found the base in the dollar bin section of Target.  I had the ribbon on hand and used my Silhouette machine to create the center.


So what do you think?  We think it turned out great and just in time to get in the mail before the party.  Another party score!

June 24, 2013

A Little Note Holder

I have recently been working on making my crafting area the space that I really want {promise to show pics as soon as it's done}.  I began about a month ago organizing the mounds and mounds of craft supplies that I have.  After finding myself in a pile of ribbon, scrapbook paper, rolls of vinyl and about a million other things, I found two little wood plaques that forgot I purchased or even what I purchased them for...lol.

Deciding what to do with them was pretty easy.  I looked around at the supplies I had and quickly picked out some scrapbook paper, spray paint and headed straight to my Silhouette machine.

Look at the fab little note holders I whipped up!


Now, back to craft space renovation.  Stay tuned and in the meantime....

June 14, 2013

Before Meets After -- Linen Closet Organization

Do you find that you have several unfinished projects going on around your house?  I've had a "to do" list running in my head for several months now, always with the promise that I will take care of it...soon.  Now that school is out, "soon" as arrived and it's high time I get these items checked off.

My linen closet has been begging for my attention for at least a year {probably longer, but who's counting}.  It's such a small space so it only needed a little organizational TLC.

I went shopping for baskets in Hobby Lobby.  I found several that I loved but wasn't crazy about the prices.  I knew that I only needed three, preferably three different sizes - something like this.

Natural Rush Basket set with liners {picture from Hobby Lobby}


With a $54 price tag {or larger},  I needed to start thinking of other options.  Back to my favorite store to shop for bargains -- The Goodwill!  It took me several weeks to find what I was looking for but I got lucky and found these great containers.


Containers made of wood

They are heavy and very sturdy containers and I was over the moon when I saw them just sitting on a
table.  Seriously, I almost ran over a little old man trying to get to them before someone else did {hey, bargains bring out the worst in a person...lol}.  The best part of this find was the price.  All three together only cost me $11.  Major score!


Though I loved the containers themselves I wasn't so in love with the color, so time to get that small flaw taken care of.  I grabbed my sand paper and tack cloth and got right to work.


Sanding time

They only needed a little sanding work to get them ready for painting.  Then outside I went to get them spray painted.  I used Valspar spray paint and I'm in love with the coverage and finish of this brand.


Sanded and ready for painting


Great coverage -- only required one coat


The finished product - beautiful!

To finish them off, I used my Silhouette machine, scrapbook paper and some great chalkboard vinyl from Pick Your Plum to create the labels for each container


Labels on each container

Here is where my Before Meets After:


It feels great to have one thing crossed off my mental to do list.  I'll be working hard over the next few weeks to get several more checked off too!  What are some of your 'to do' list items and how do you plan to tackle them?


June 5, 2013

The Doc Is In!

My best customer has once again asked that I stretch my crafting ability to help with her daughter's 5th birthday party.  This year's theme -- Doc McStuffins.  Now let me tell ya, I love this show personally but my little guy will only watch it when there is "nothing else good on" {the words that come out of that boy...lol}.  So I was excited to help make her little girls' dreams come true with some very cute centerpieces.

The Doc Is In...let's party!


After searching the internet, she found centerpieces that she loved but didn't love the price.  She immediately emailed me the picture and asked if I could do something similar.  Because she is totally okay with my creative license when doing work for her {which I love!},  I was able to use the photo as a starting point to create something that was functional and that she would be proud to display.

I started off the project with the intent to try and get these centerpieces as close to the original inspiration as possible, so when I saw these great buckets in the dollar bin section of Target I was excited.  They were a great size but the wrong color -- nothing a can of spray paint wouldn't fix.

$1 bucket from Target

Sprayed with white primer

Spray painted hot pink

Now for the images.  My customer wanted the centerpieces to look the same from both the front and the back.  She was able to find free images online that we used so the next step was to create each one in mirror image -- the most important step for making them back-to-back.  I don't have Photoshop and wasn't sure how we were going to do this but she was determined and found a way to do this herself {girl power!}.  I took the images to the UPS store to have them enlarged.  The plan was to make the images fill an 8 1/2 x 11 sheet of paper but that proved to be more difficult than either I or the young man at the store thought it would be.  In the end, I had to settle on them being as big as he could make them {which wasn't very large} and that meant I would have to rethink how these centerpieces would be done.

Enlarged image - cut out

Traced on foam core board then cut out with a straight razor.
Each image was then glued front/back to the board.

Since the images were smaller than expected, I needed to find a smaller container.  Target to the rescue again!  After saying a little prayer, I walked in and what did I see in the dollar bin section but a stack of these beautiful white containers.  It was like I heard a choir of angels singing 'hallelujah'...LOL!


$1 container from Target

Using my Silhouette machine, I cut the shapes needed to decorate the smaller container.

Hot pink oval glued to each side


Number five

Adding polka dots

Fifteen minutes and front/back is complete

Sides completed -- total time approx. one hour

When I placed the containers together one on top of the other, I didn't like how 'unfinished' the bottom container looked.  So I decided to make something simple to go around the bottom of each one.

Cut strips of tissue paper in hot pink and purple.  Using hot pink ribbon
I glued the strips on in an overlapping fashion to create a "skirt" for
the bottom of each larger container.

Measured 1 1/2 inches from the bottom and glued the ribbon around the bottom.

At this point in the process I was under the gun.  I was working on three different projects simultaneously and I didn't have the time to document the way I wanted to -- most of this project {and at least one of the others} was done very late at night.

So let me tell you how I wrapped it all up. Using glue {and a three pound weight}, I attached the small white container to the larger one.  I cut off about an inch of the tissue paper and made small slits in each section to give it a "fringe" look at the bottom.  I cut out the name on my Silhouette and glued them on the larger containers {both front and back}.  I attached each image to the base using thin purple craft sticks and inserted them into a cut piece of styrofoam that I purchased from the dollar store.  To finish them off, I took the same hot pink ribbon and glued it over top of the fringed piece at the bottom and filled each container with tissue paper and VOILA...sweet and charming centerpieces!

Lambie


Stuffy

Doc McStuffins
NOTE: Apologies for the poor individual photos.  I was in a hurry to deliver these and realized I hadn't taken pics.  I took several and these were the best.  Must remember to look at the settings on my camera before taking pics...oy vey!

I love helping others make memories.  Happy 5th Birthday Miss Corrine!!!

Where we like to party!


Related Posts Plugin for WordPress, Blogger...